Page 1 sur 2
demontage du moteur, CA MARCHE !!!!!!!!!!!!!!!!
Posté : lun. 14 mars, 2011 2:09
par loic
salut tout le monde, ca fais un moment que je suis pas passer mais comme on dit je suis pas mal busy, J'espere que vous etes tous en forme.
ok, je suis en train de changer mon join de culasse, je vais poster des photos et mes commentaire que j; ai mis sur zzrbikes.com. maintenant, j'ai tout demonter et j'attend de recevoir toutes les pieces et different joints que j'ai commander, je vais aussi essayer de trouver un "machine shop"pour quil puisse verrifier que la cullasse est droite. apres ca sera le remontage.... j'ai mal au dos........
![[smilie=greencolorz4_pdt_15.gif]](./images/smilies/GreenColorz4_PDT_15.gif "Moquerie")
I'll try to take pics as I go.
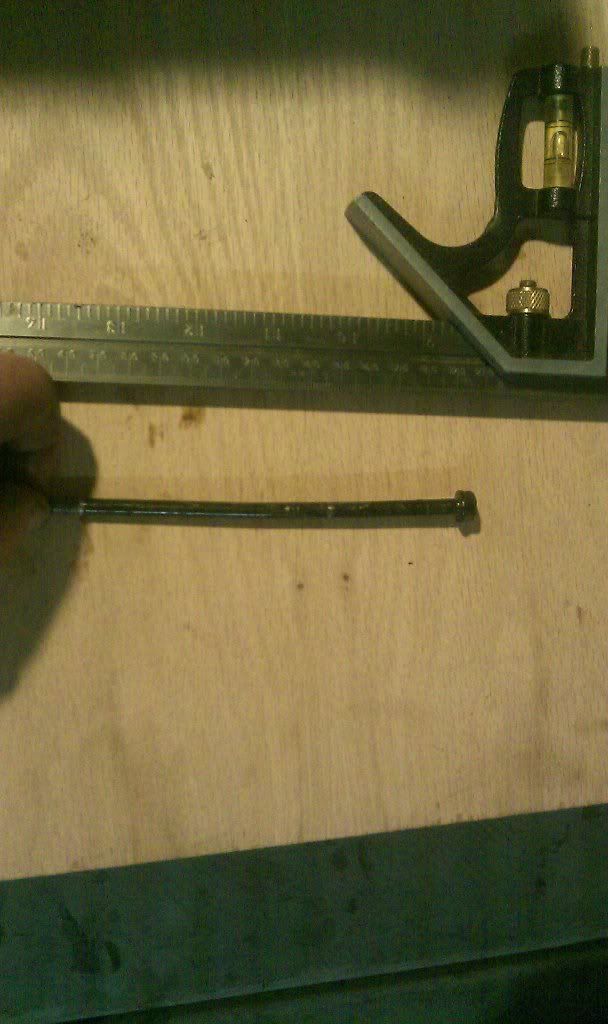
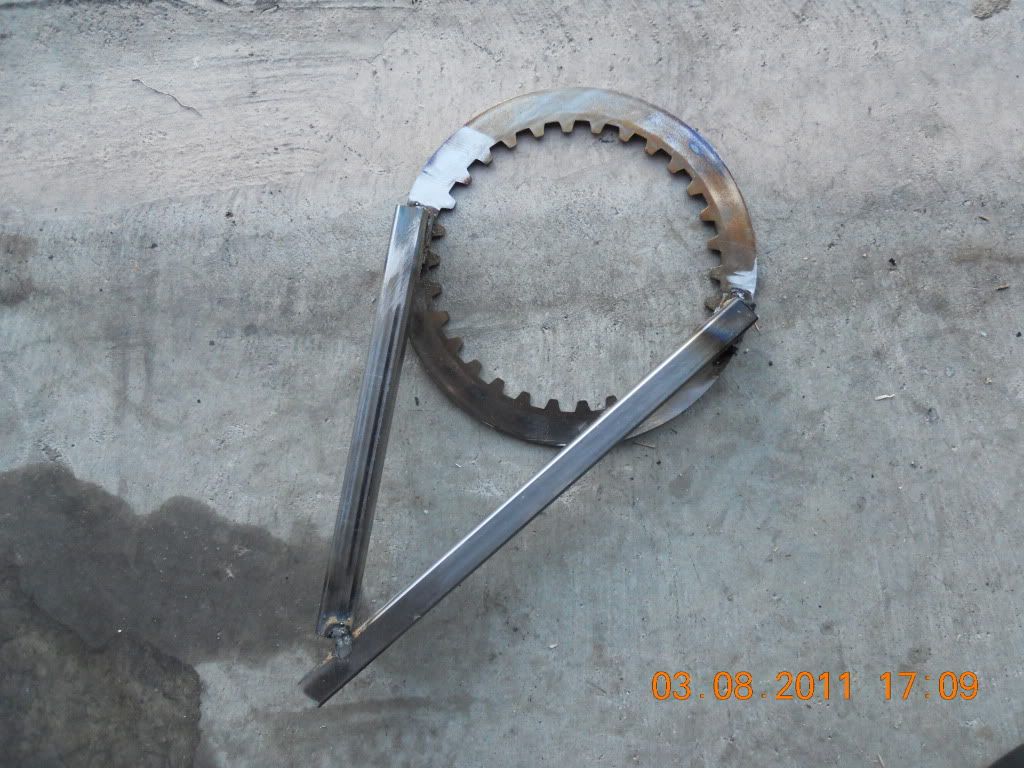
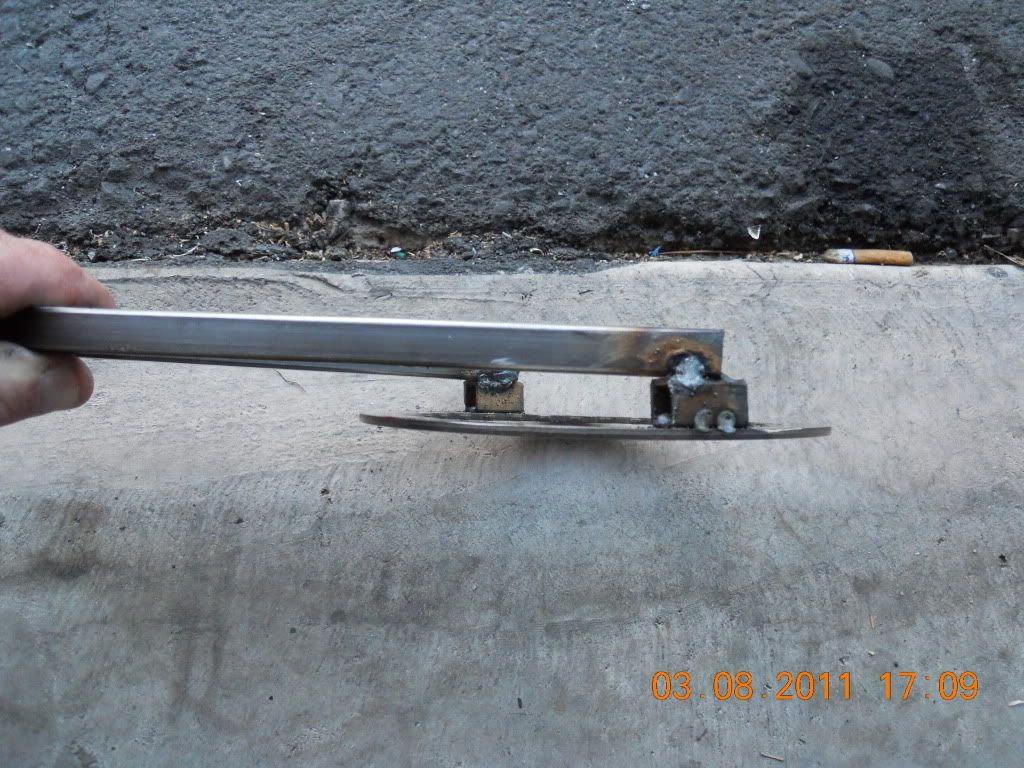
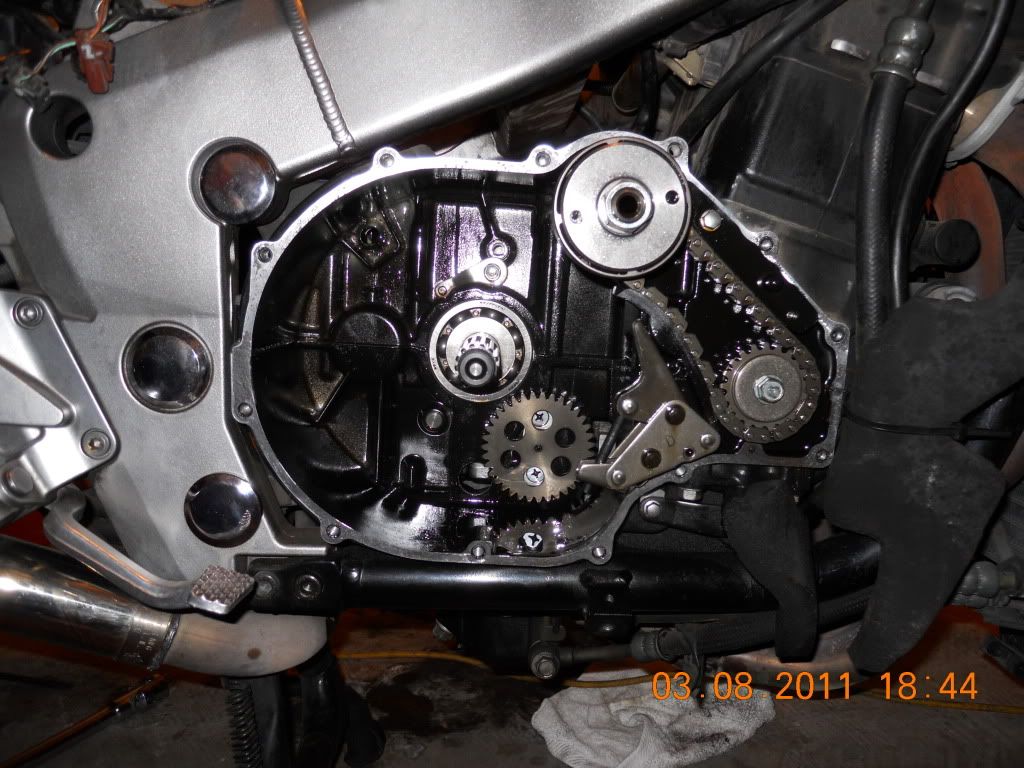
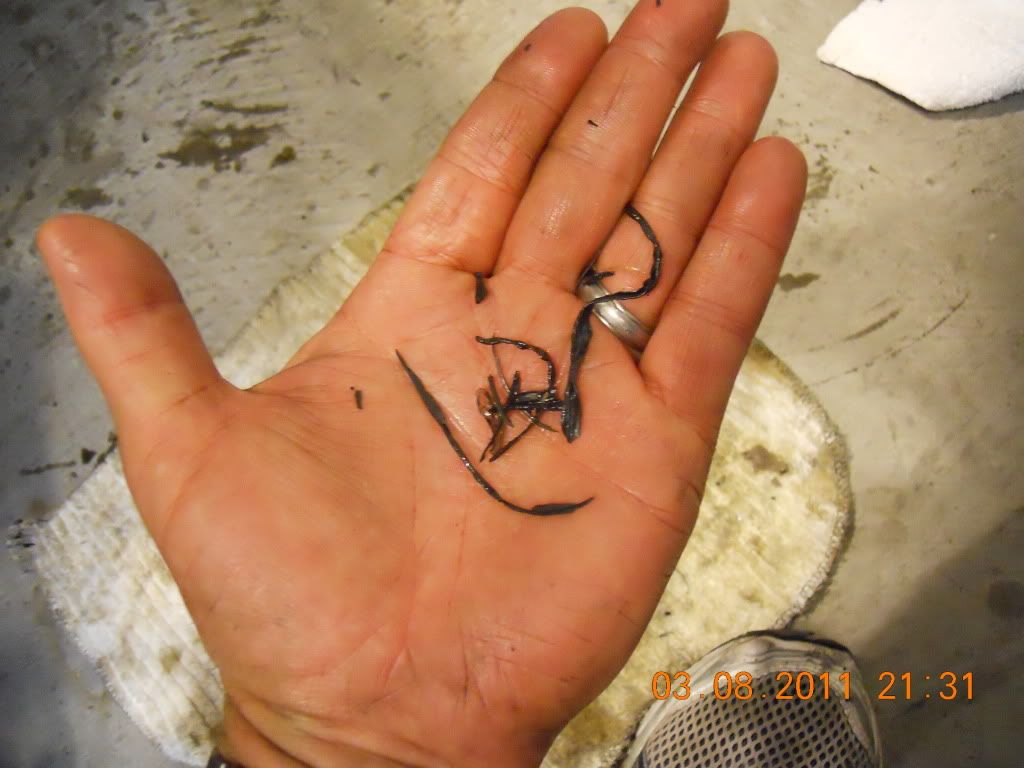
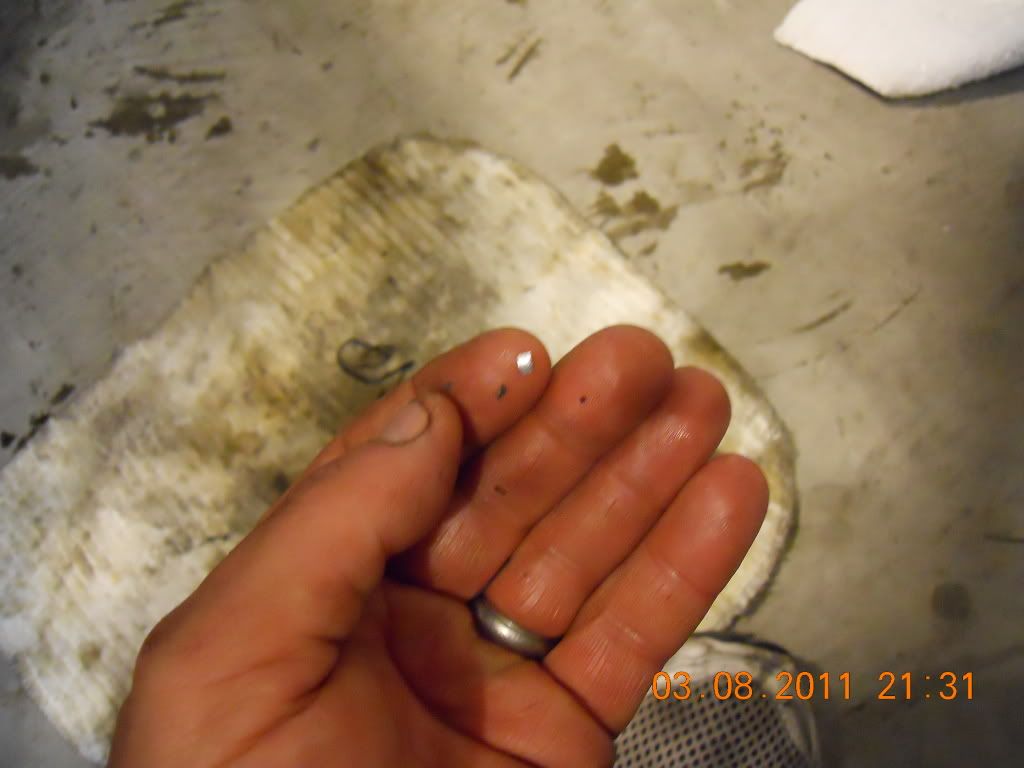
so far I removed tank, air box, fairing, nose (headlight) fuel pump, carbs, alternator, starter, radiator, oil cooler, clutch with basket, chain tensioner and chain assembly by the clutch, oil pan, exaust and header. the "tool"I made to remove the 30mm nut worked well. I found a lots of rubber thinky stuck in the screen of the oil filter and also some metal shaving no ferous (spelling?)
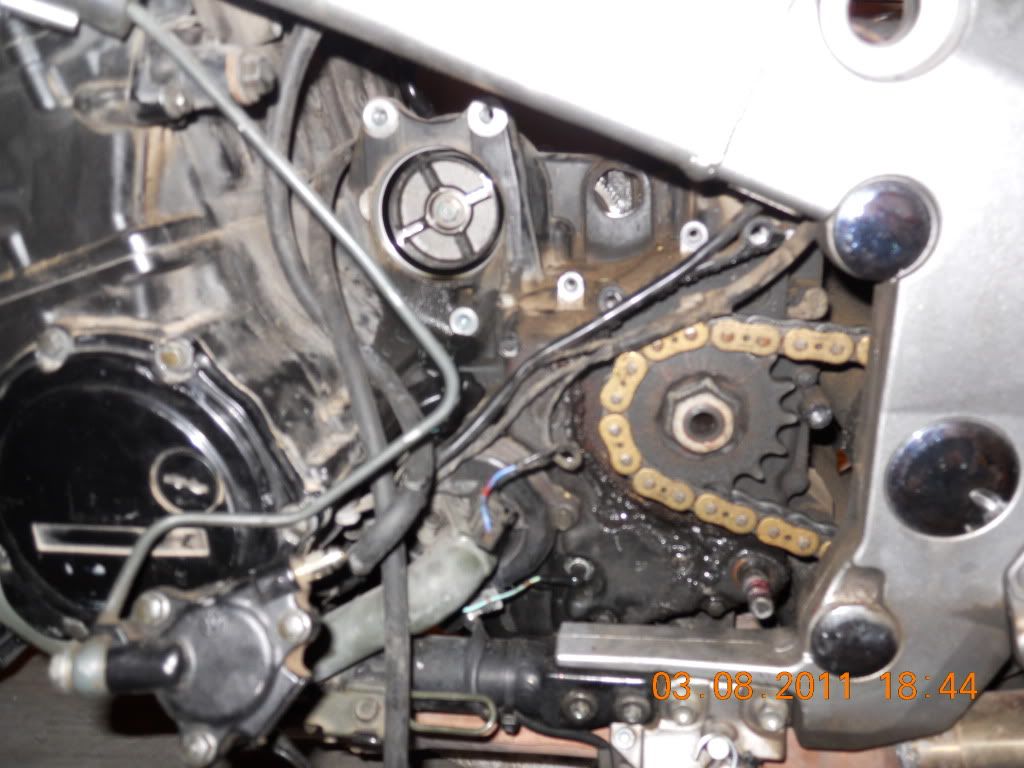

the nut on the top right is 22mm, the chain /tensioner assembly need to be removed , inpact wrench worked well (no need to buy kawi tool)
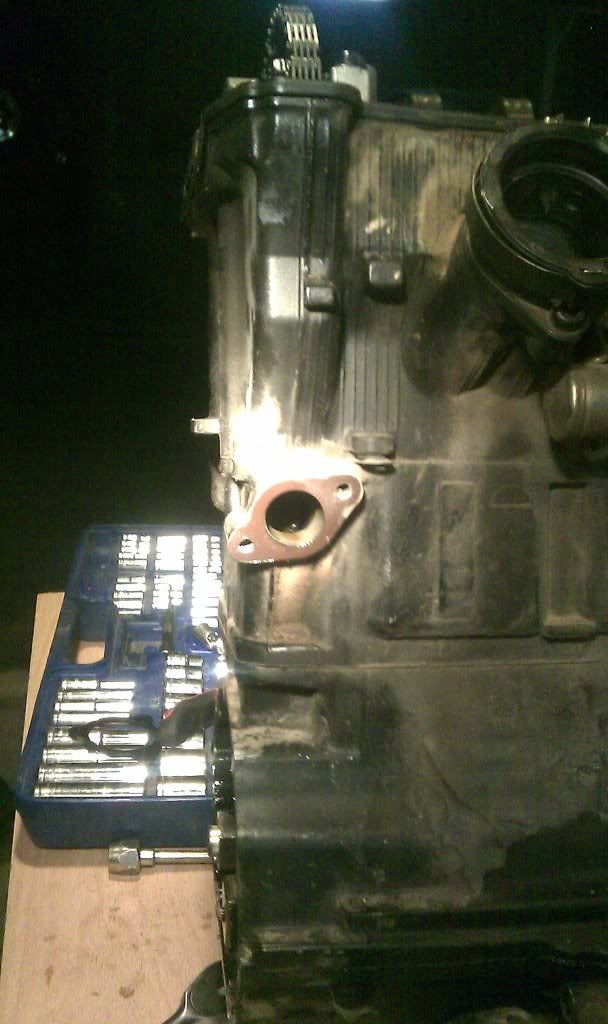
now this oil line.... the thread is backward :-x
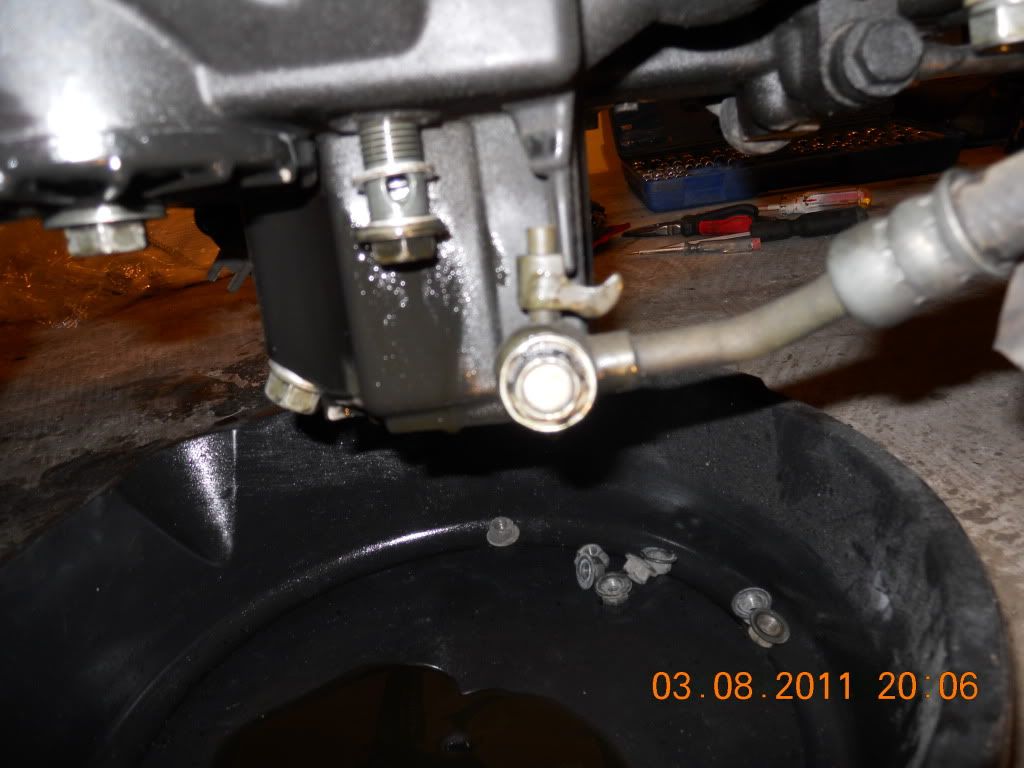
this is what I found in the oil filter:
and some metal shaving...:-x
Posté : lun. 14 mars, 2011 2:10
par loic
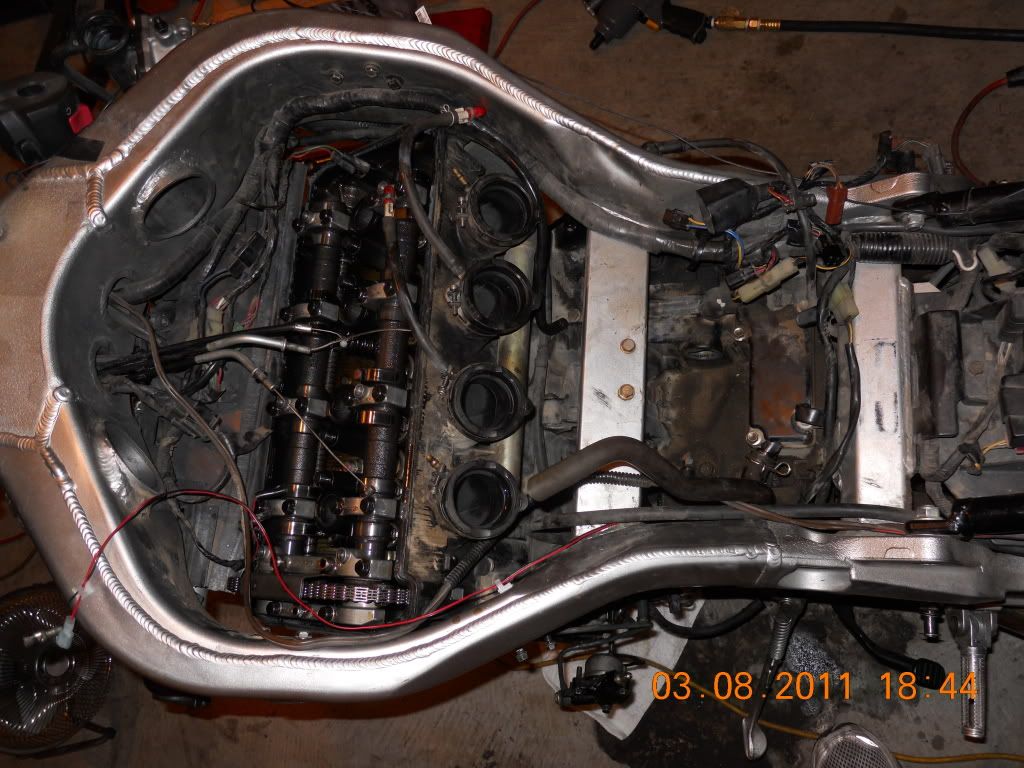
today I worked on the bike for about 3.5 hours, I removed the rest of the coolant tube/ hoses, some other oil tubes the oil pump bracket and oil pump th eblack tube on both side that hold the engine and finally removed the engine then call it a day.
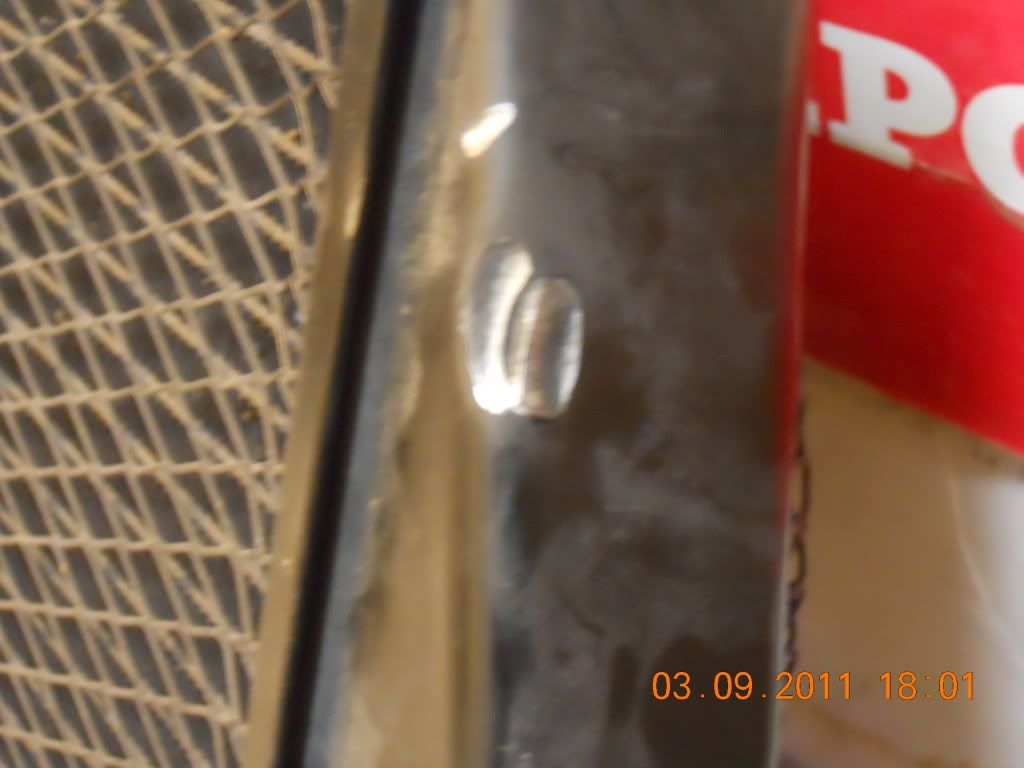
here is a pic of the radiator left side (while on the bike) tell me what you think, should I get it fix or leave it like that?


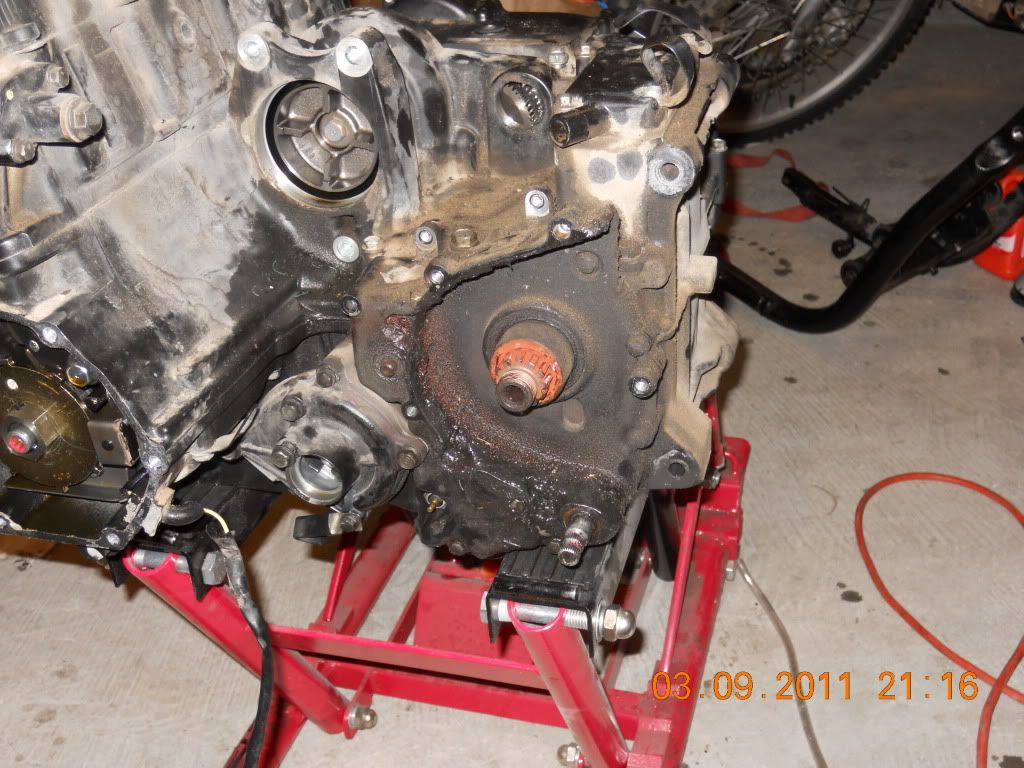
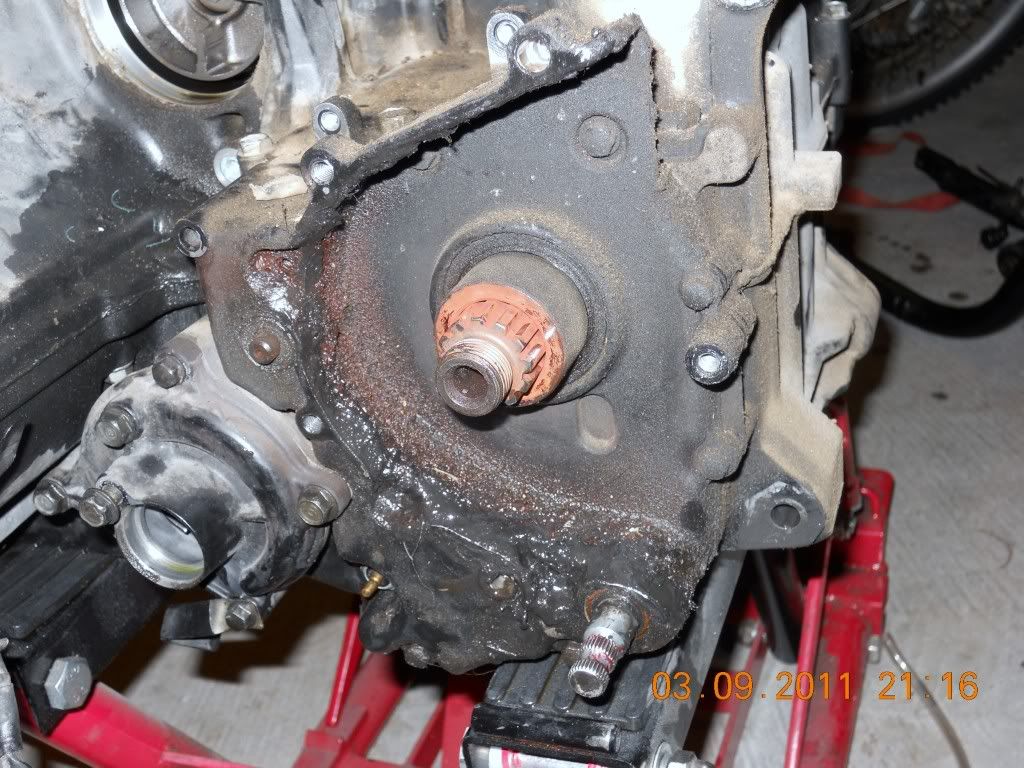
front sprocket, all red!! where does that come from? the bearing inside ?:?
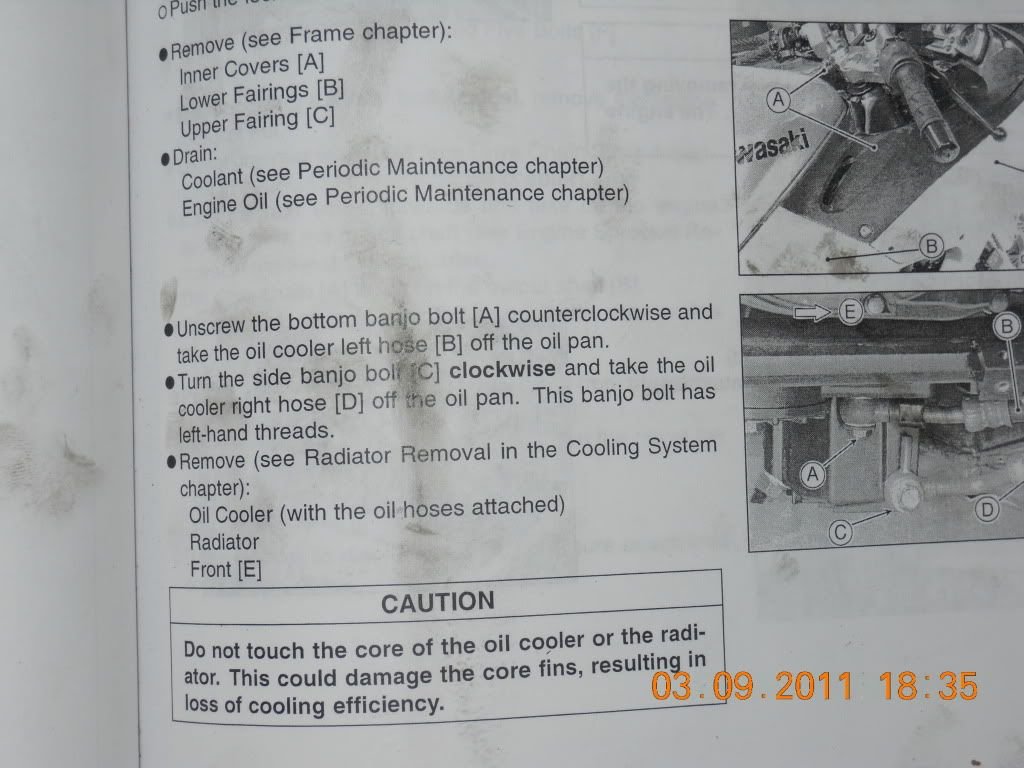
here its where it says that the banjo bolt's thread is backward, but it doesn't say it in the oil cooler removal (or I didn't see it...)
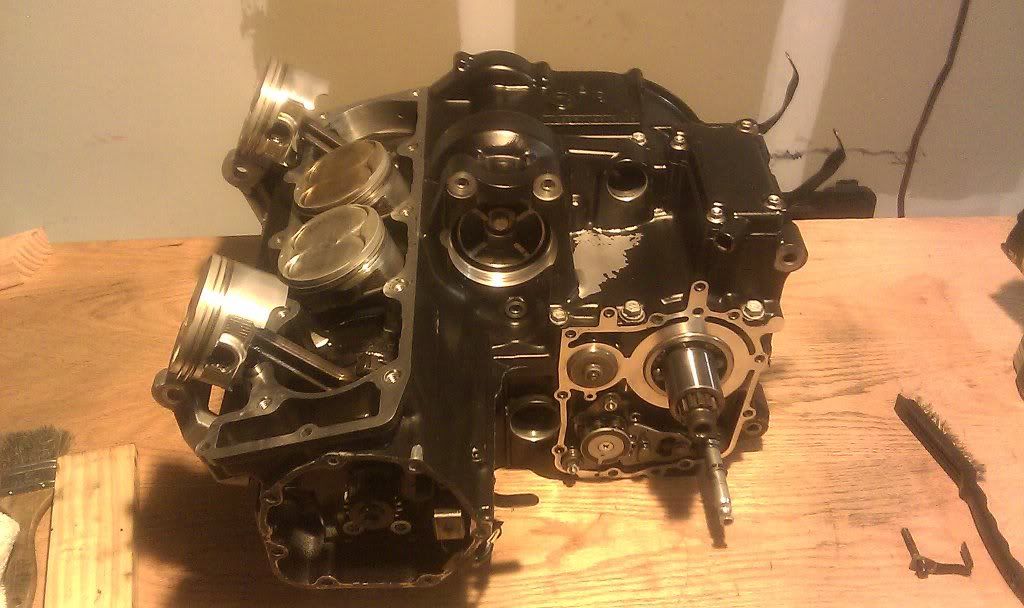
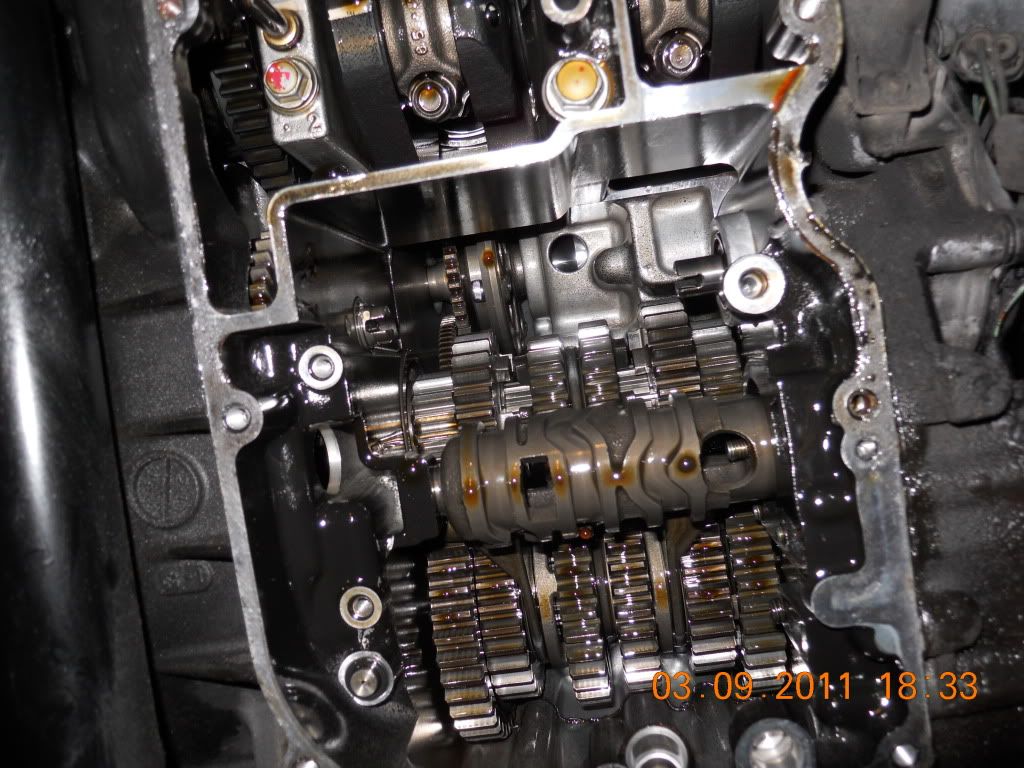
bottom of the engine without the oil pan:
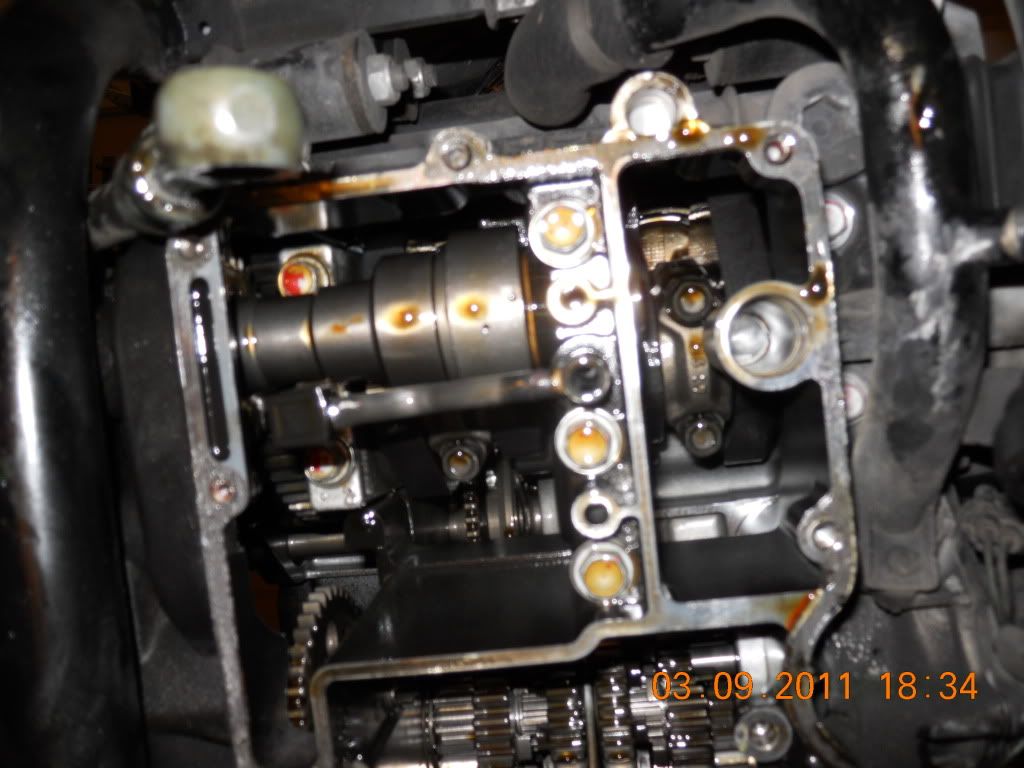
oil pump and oil pump bracket (removed in 1 piece)

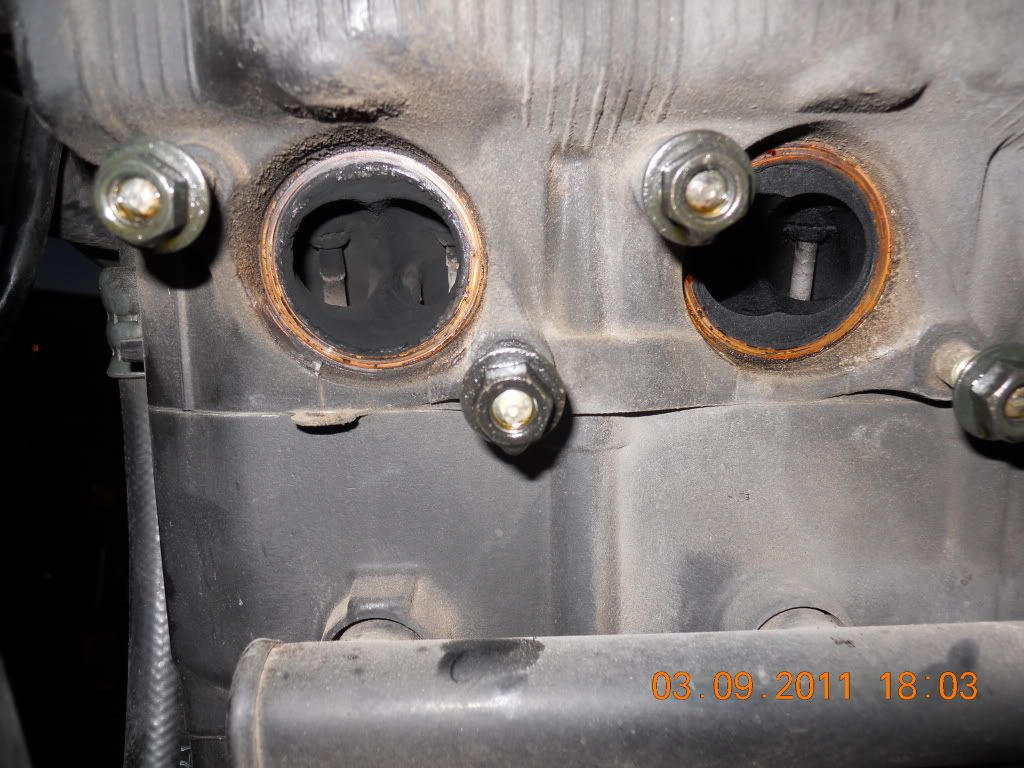
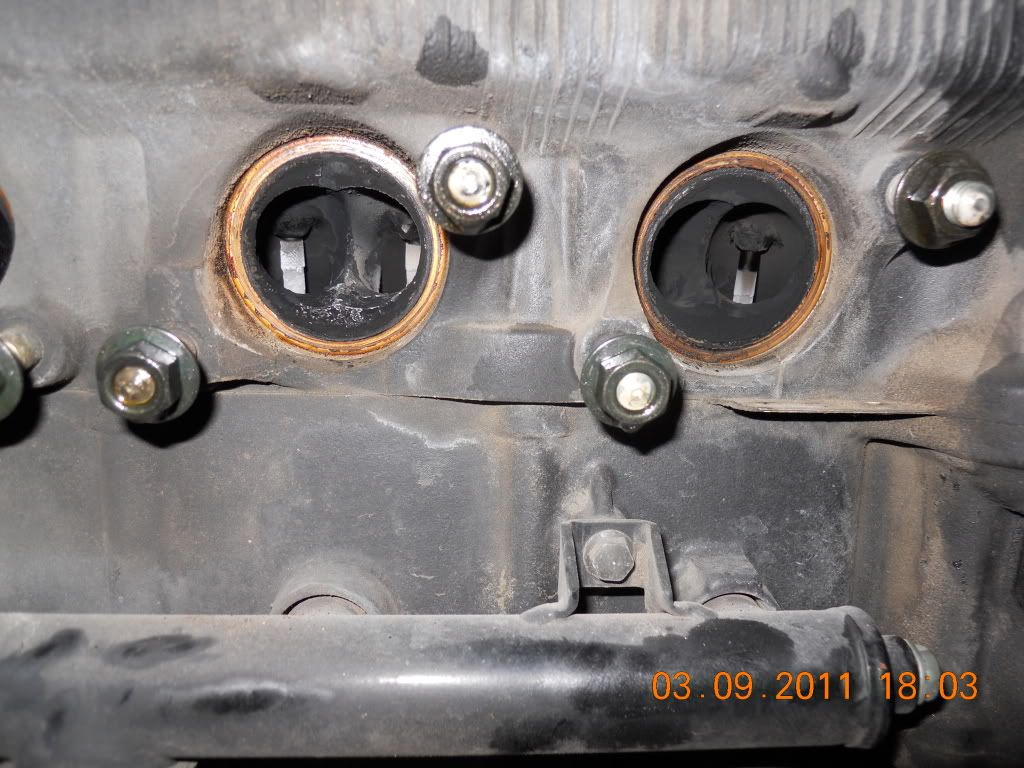
view of the exaust, notice the stems...
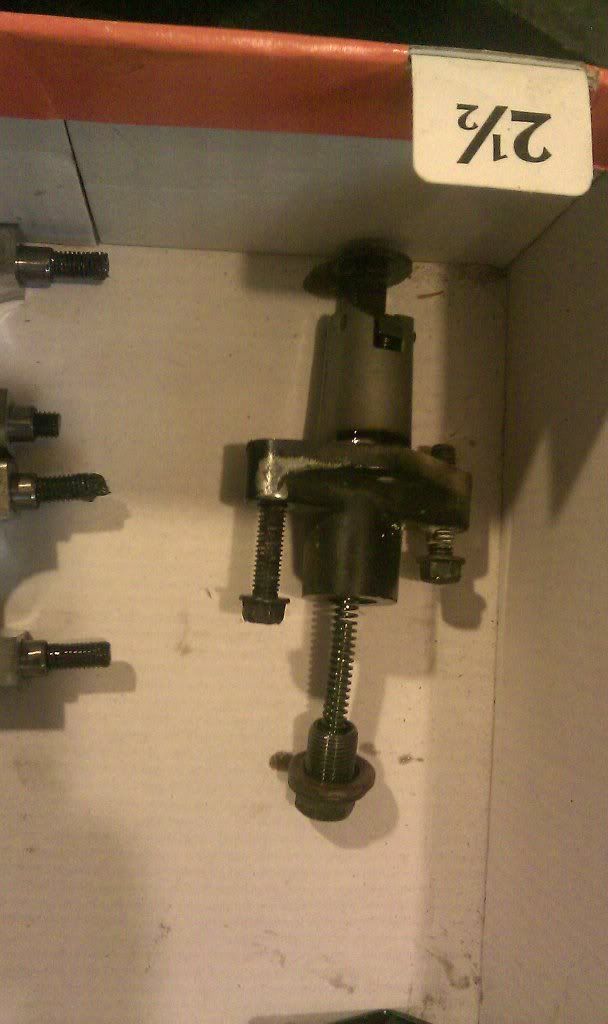
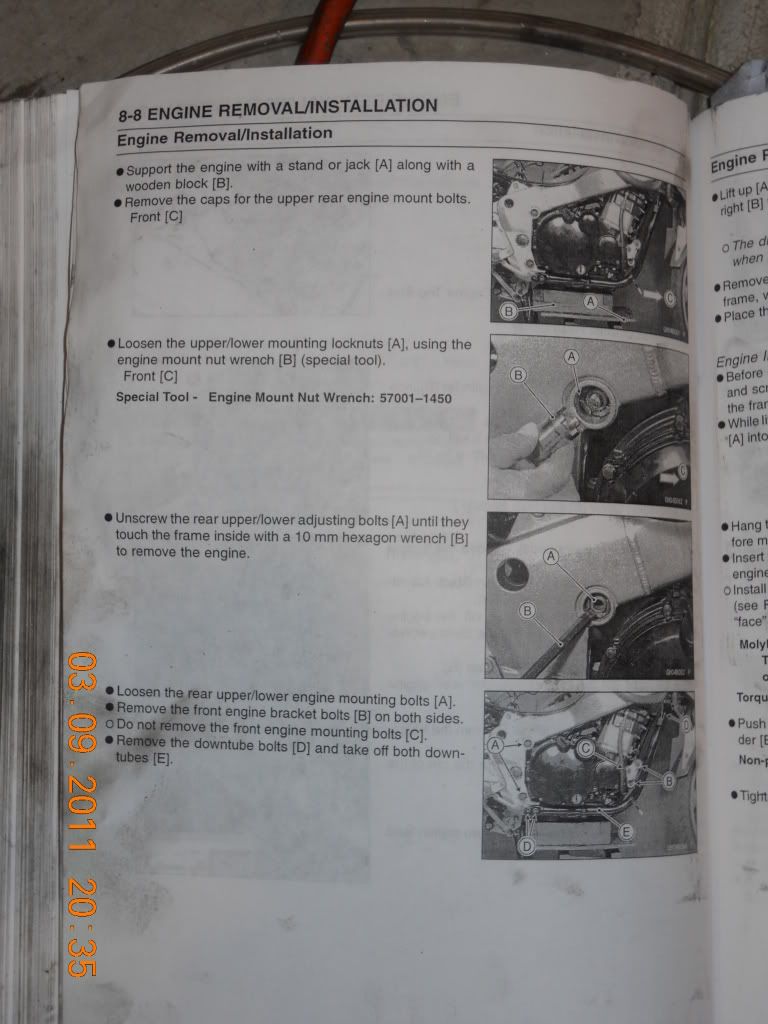
got stuck for a while here, to me the way they explain didn't make sens,
it says to LOOSE up the nut with special tool and then push with a 10 mm hex key until it touches the frame... but you have to loose it up, then REMOVE the nut that it's in front of it while holding with a 14 mm the back, REMOVE the special nut THEN push the bolt with the 10 mm (or anything that size) up to the fram on the other side.
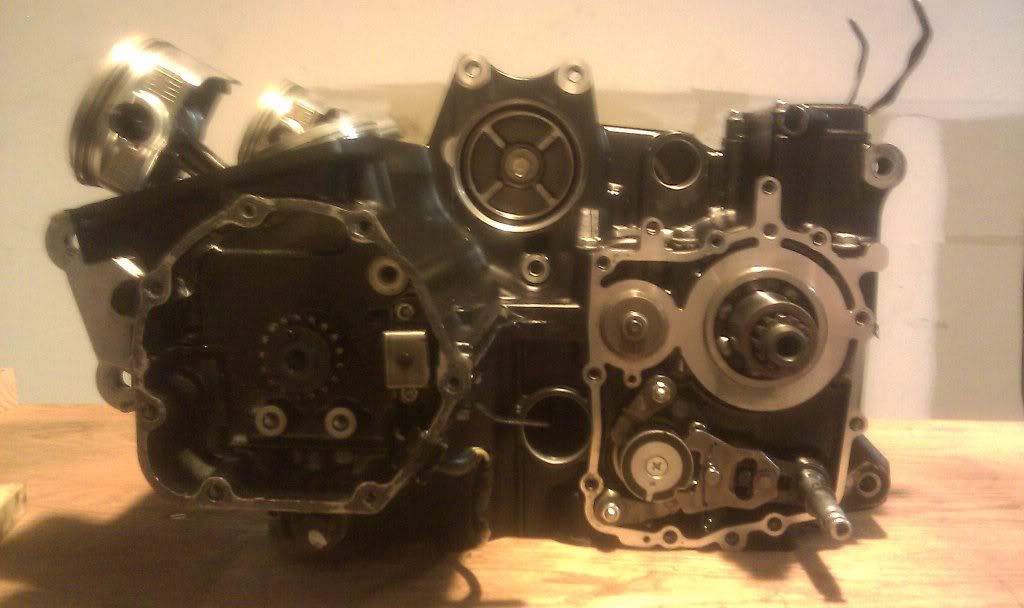
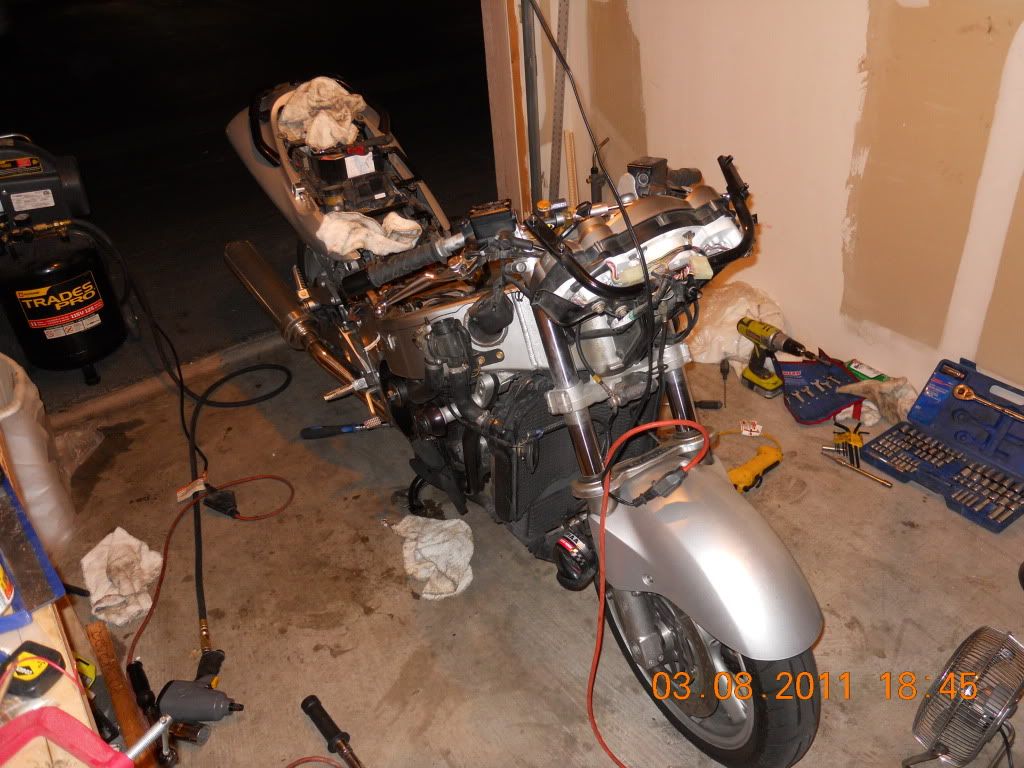
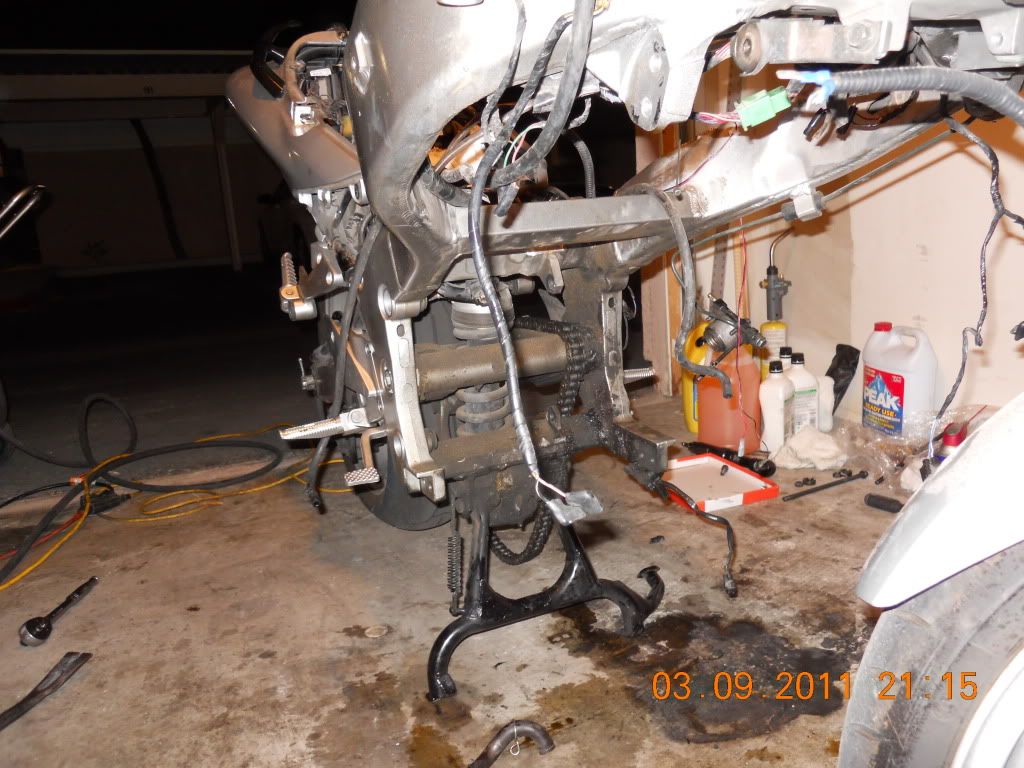
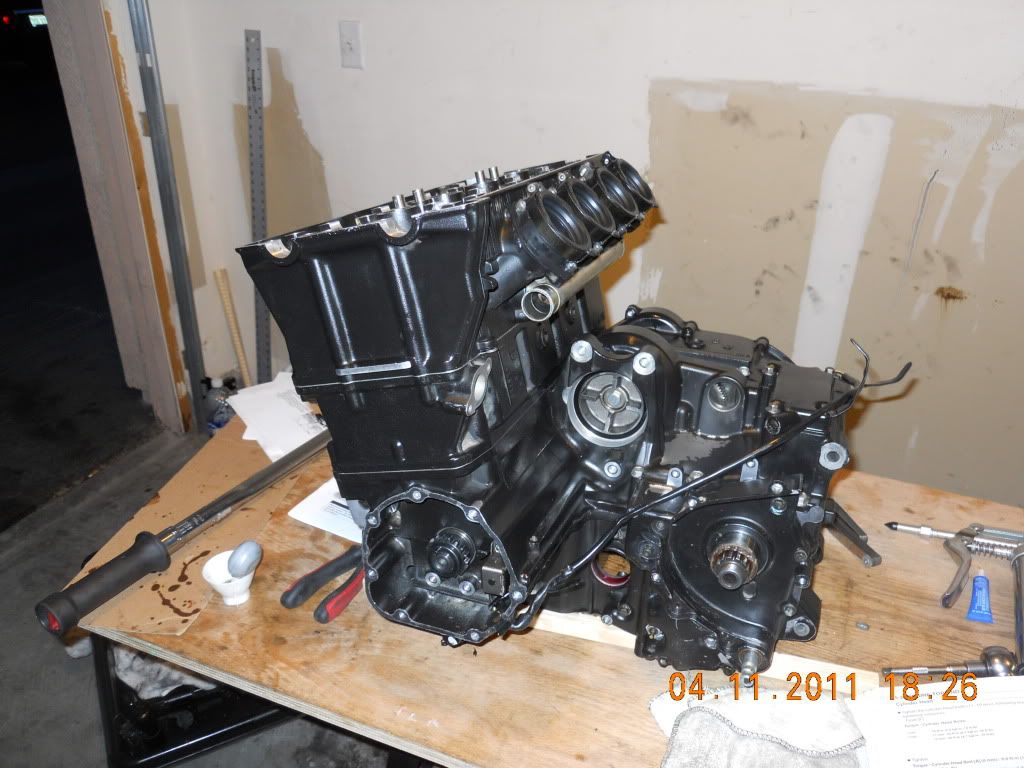
finally the engine is out of the frame
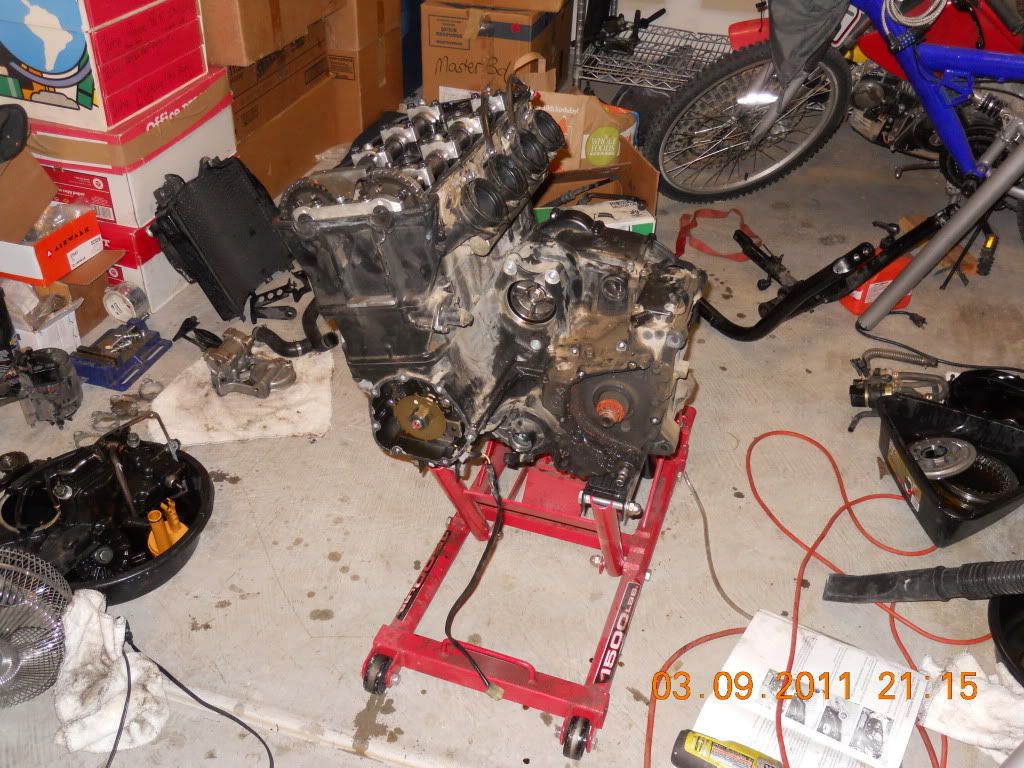
looks empty........
Posté : lun. 14 mars, 2011 2:11
par loic
Posté : lun. 14 mars, 2011 2:11
par loic
Posté : lun. 14 mars, 2011 12:31
par bk95
Posté : lun. 14 mars, 2011 20:26
par Sim47
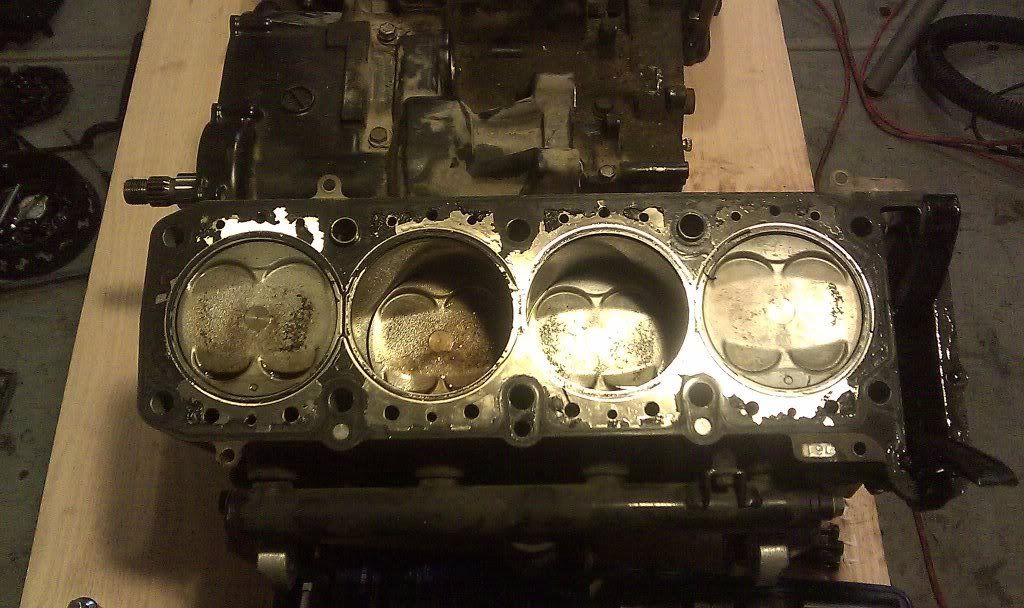
Je vais poser une question bete, mais tu dis que tu changes le joint de culasse, mais quand je vois des pistons démontés je me dis que t'es allé "légèrement" plus loin. C'est due à quoi tout ca? Aux petits chocs sur ta culasse?
Posté : lun. 14 mars, 2011 21:00
par loic
Sim47 a écrit :Je vais poser une question bete, mais tu dis que tu changes le joint de culasse, mais quand je vois des pistons démontés je me dis que t'es allé "légèrement" plus loin. C'est due à quoi tout ca? Aux petits chocs sur ta culasse?
2 raisons, 1 je voulais m'assure que les pistons soient en bon etat , 2 j'ai emmener les cylindre (et la cullasse) ce matin a un machine shop. il vont regarder la cullasse et vont me refaire le pas de visse qui a ete foire par des mechano 5 ans en arriere.
Posté : lun. 14 mars, 2011 21:02
par loic
comme ca tu peut venir au US t'aurra pas de problemes
Posté : lun. 14 mars, 2011 21:03
par lolo34
Au départ à mon avis il était partie que pour le joint de culasse, mais en faisant sa vidange il à trouvé de la limaille de fer donc à ouvert et à trouvé de la mayonnaise à un endroit.
Posté : lun. 14 mars, 2011 21:22
par loic
presque,
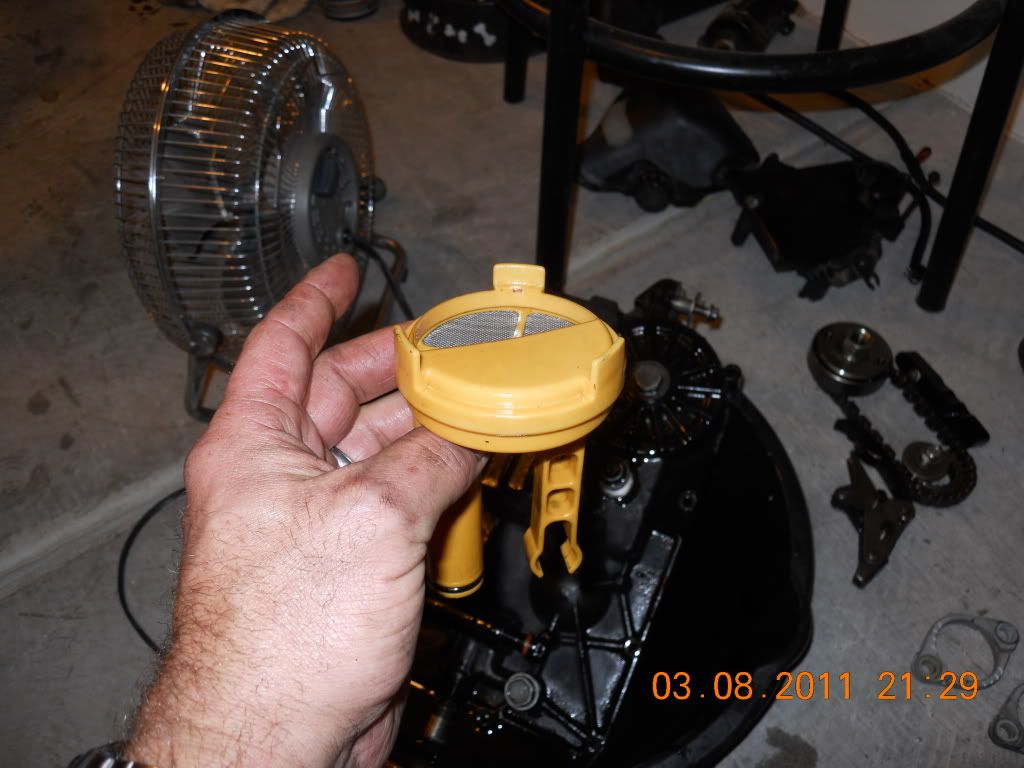
le morceau de metal, je l'ai trouver and le filtre en plastic qui ce trouve a l'interieur du moteur, actuellement il y a 2 filtre en "grillage" dans le moteur en + du filtre a huille .
en voyant ce morceau de metal je me suis bien sur inquieter et je voulais regarder partout pour voir si un roulement a bille etait abimer ou autre chose. je n'ai rien trouve. je suppose que ce morceau vient soit au debut quand le moteur etait neuf, soit lorsque les boucher, je veux dire les mecano on bosser dessus il y a 5 ans..
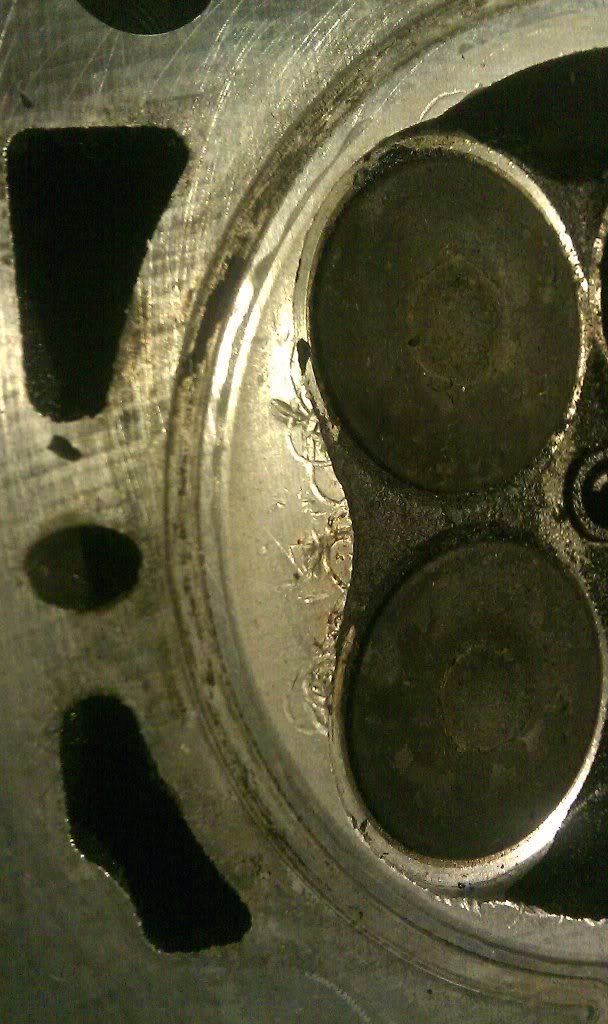
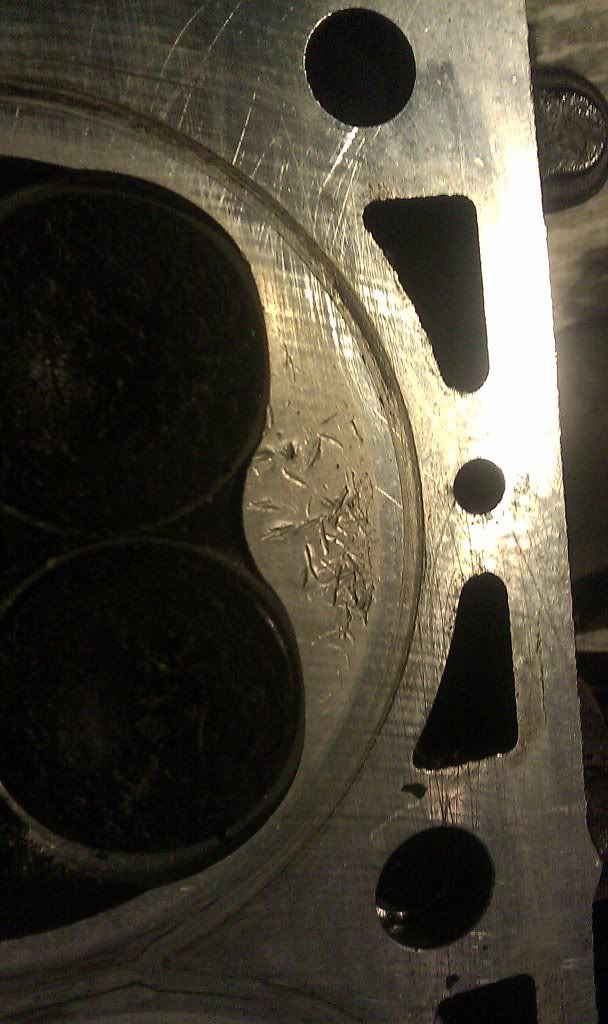
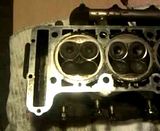
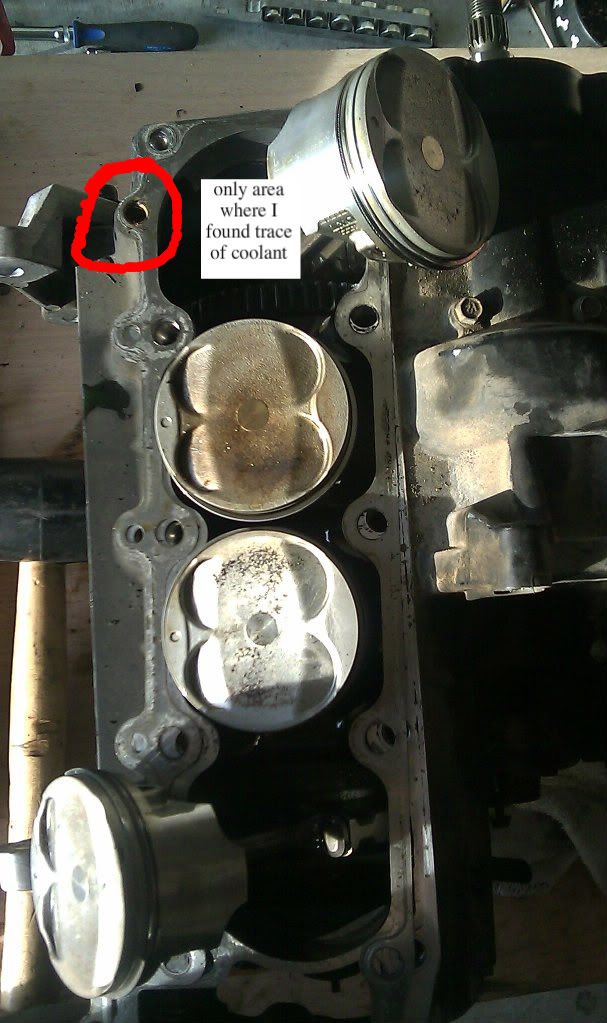
la mayonaise, je pensait en trouver partout etant donner que j'avais une legere fuite de liquide de refroidissement, mais c'est le seul endroit ou j'en ai trouve.
Posté : mar. 15 mars, 2011 8:09
par Titi
Joli boulot
![[smilie=greencolorz4_pdt_01.gif]](./images/smilies/GreenColorz4_PDT_01.gif "Cool")
2 filtre en "grillage" -> ce ne serait pas la crépine ?
Posté : mar. 15 mars, 2011 9:18
par dnstouron
Titi a écrit :Joli boulot
2 filtre en "grillage" -> ce ne serait pas la crépine ?
+1100
![[smilie=greencolorz4_pdt_14.gif]](./images/smilies/GreenColorz4_PDT_14.gif "Heureux !")
Posté : mar. 15 mars, 2011 11:25
par loic
aucune idee comment on dit en francais...lol
1 ce trouve dans le truc en plastic jaunatre et lautre dans....le...."oil pan".....
sorry... lol
Posté : mar. 15 mars, 2011 11:49
par zzr 61
en tout cas ca fait plaisir de te relir !!!
![[smilie=greencolorz4_pdt_12.gif]](./images/smilies/GreenColorz4_PDT_12.gif "génial")
Posté : mar. 15 mars, 2011 16:03
par claudius
zzr 61 a écrit :en tout cas ca fait plaisir de te relir !!!
+ 1, Loïc.
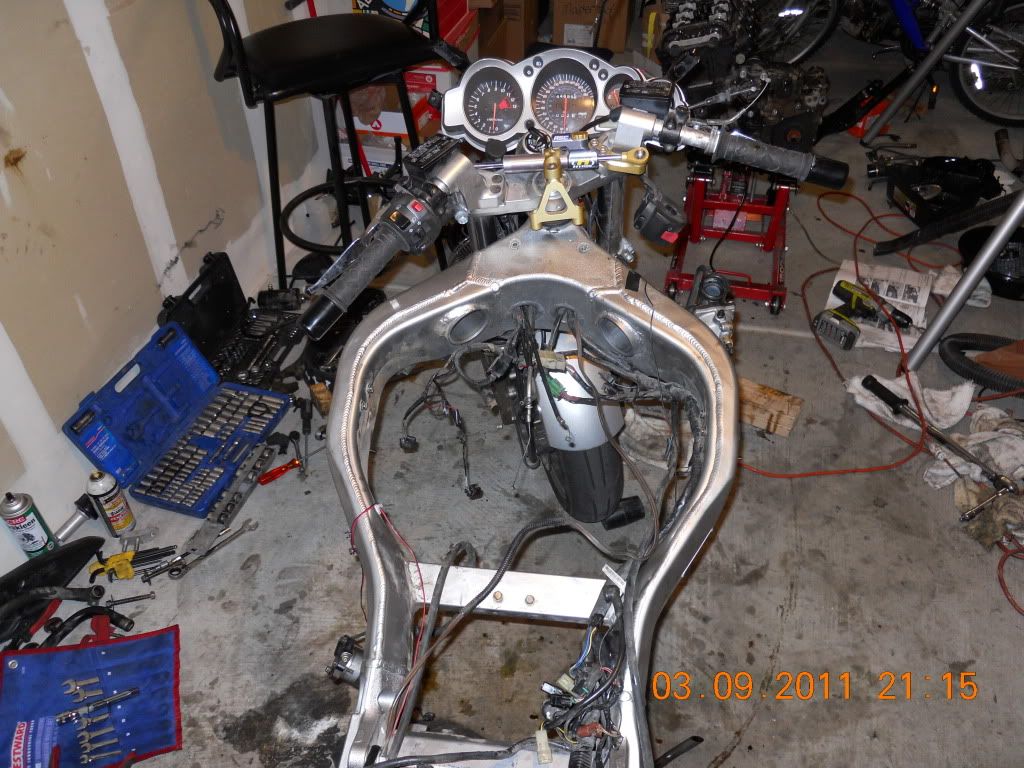
Ca me stresse toujours de voir un ZZR " naked ". Je dois être trop pudique ...
@Bk95 : Perso, je préfère lire un commentaire précis en version originale qu'une traduction approximative en langage gaulois. Il suffit de prendre des cours et de s'adapter ....
Posté : mar. 15 mars, 2011 16:51
par loic
merci !
une petite note au cas ou quelqu'un a bedoin de demonter les lignes a huille, sur la photo que je montre, la ligne a un pas de visse a l'envert...
Posté : mar. 15 mars, 2011 16:56
par Supergus
content de te relire Loïc....
Posté : lun. 11 avr., 2011 22:41
par loic
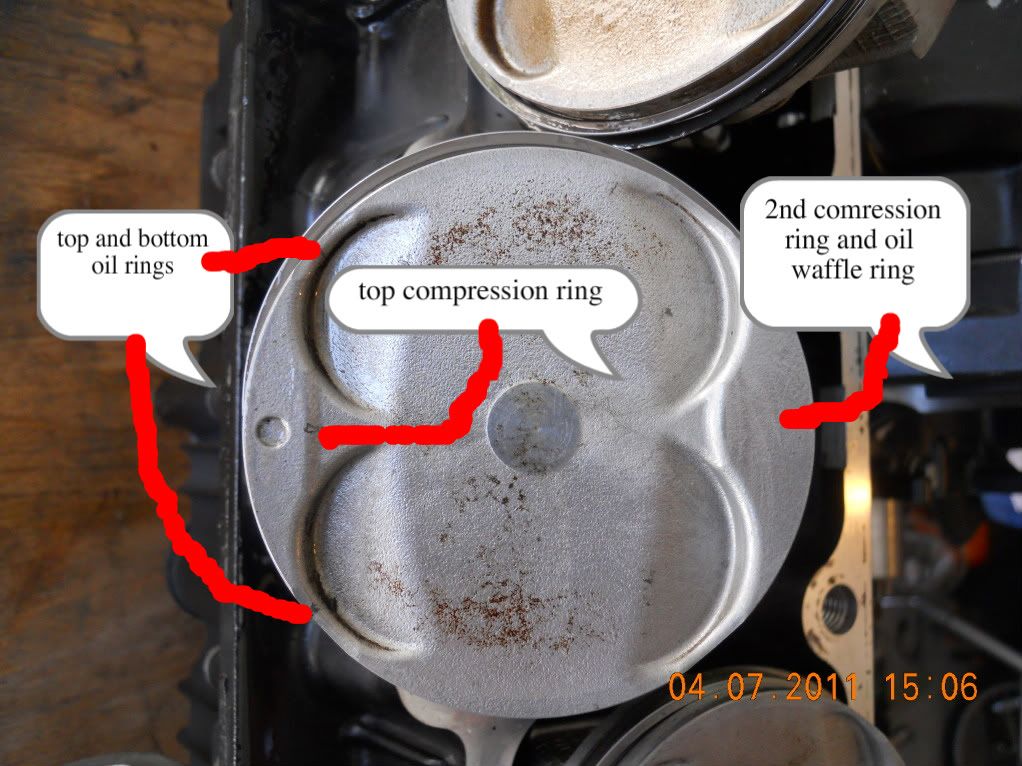
voici les pieces que je change, je change aussi les segment des 4 pistons.
j'ai ammener la cullasse et les cylindre dans un machine shop, la culasse pour faire un "3 angles valve job" et les cylindre pour les..."poncer"(pas vraiment poncer..) le gars a enlever toutes les soupapes, changer les joint de soupapes, verifier tous les guides, nettoyer..etc...etc...
got the head back from machine shop, everything looks good now.
waiting for the parts, here is what I ordered so far:
GASKET-HEAD
750418 (1474891-001)
-
1$78.21Shipped
COVER,LWR COWLING,LH
776910 (1477015-001)
-
1$69.98Shipped
DAMPER
876337 (1490618-001)
-
1$5.38Shipped
GASKET,EXHAUST PIPE H
751325 (535778-001)
-
4$19.83Shipped COVER,LWR COWLING,RH
776911 (1477016-001)
-
1$68.44Shipped
CLAMP
877266 (637027-001)
-
3$4.72ShippedCLAMP,CARBURETOR HOLD
877329 (1490722-001)
-
1$6.42Shipped
Hot Cams Valve Shim Kit Refill Package (9.48mm OD) I'll do that as well..
65871449054-1051THERMOSTAT1$26.90$26.90
108084192022-1012WASHER,20.5X30X1.01$1.70$1.70
11317111009-1725GASKET, SPARK PLUG4$2.86$11.
4311954311061-1059GASKET,CYLINDER HEAD1$34.86$34.
8611291911009-1376GASKET,12.4X17X1.54$0.86$3.42
11296611009-1461GASKET,14X19.5X1.49$1.99$17.88
24225616065-1210HOLDER-CARBURETOR4$20.15$80.59
108826692055-1401RING-O,43.7X1.94$6.11$24.45
11322711009-1840GASKET,EXHAUST PIPE H4$3.42$13.69
11323511009-1858GASKET,TENSIONER1$1.82$1.82
11331611009-1981GASKET2$10.92$21.83
11954411061-1060GASKET,CYLINDER1$18.01$18.01
11959911061-1154GASKET,CLUTCH COVER1$5.88$5.88
11960011061-1155GASKET,PULSING COVER1$3.96$3.96
883378671B2590"0" RING,90MM1$4.35$4.35
109091592065-097GASKET,DRIN PLUG1$0.29$0.29
11956411061-1093GASKET,TRANSMISSION C1$7.40$7.40
53757239062-1377HOSE-COOLING2$16.33$32.65
53781839062-1897HOSE-COOLING,PUMP-CYL1$15.40$15.40
108828292055-1424RING-O,33.2X2.41$2.50$2.50
Posté : lun. 11 avr., 2011 22:44
par loic
Posté : lun. 11 avr., 2011 22:46
par loic
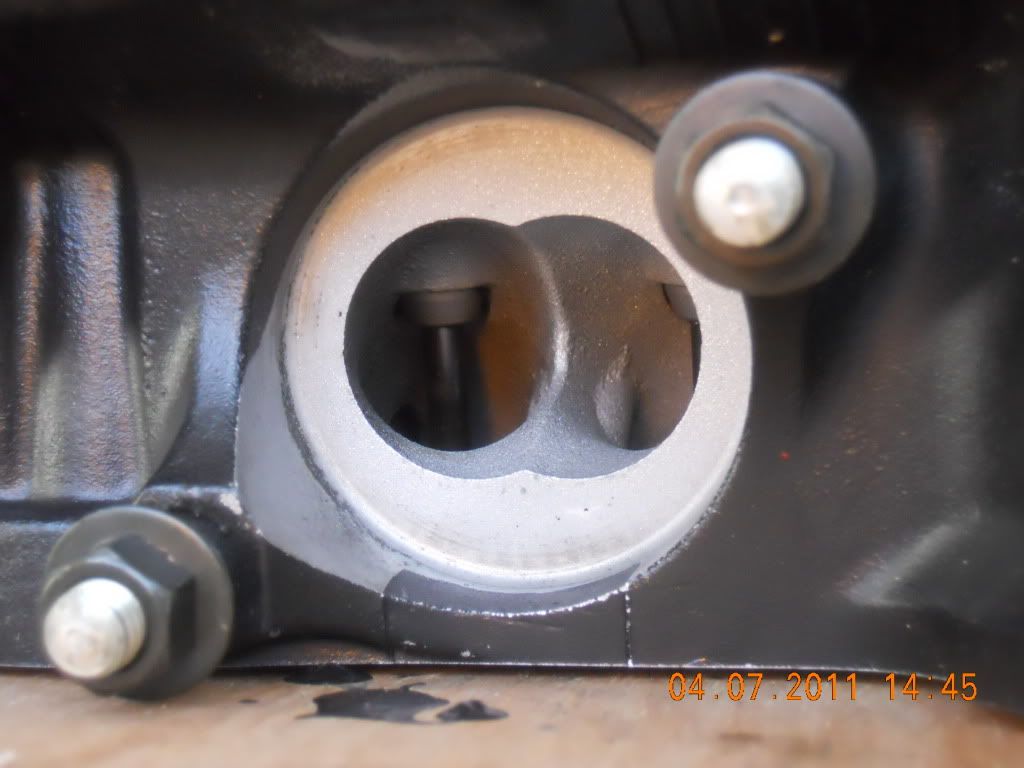
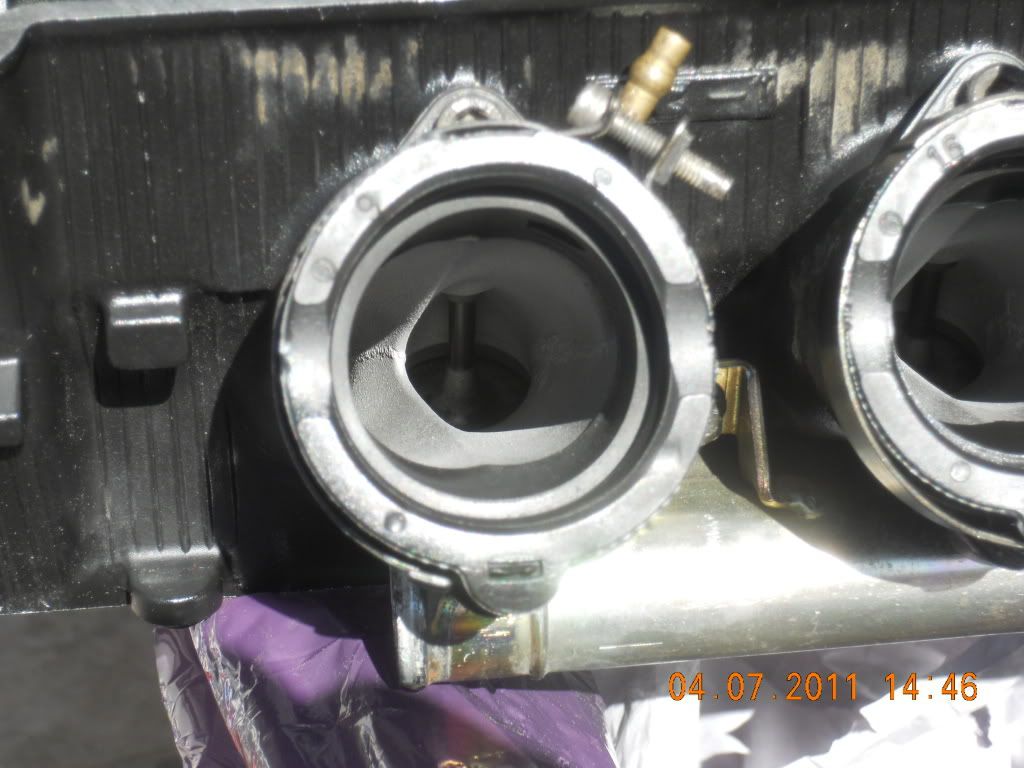
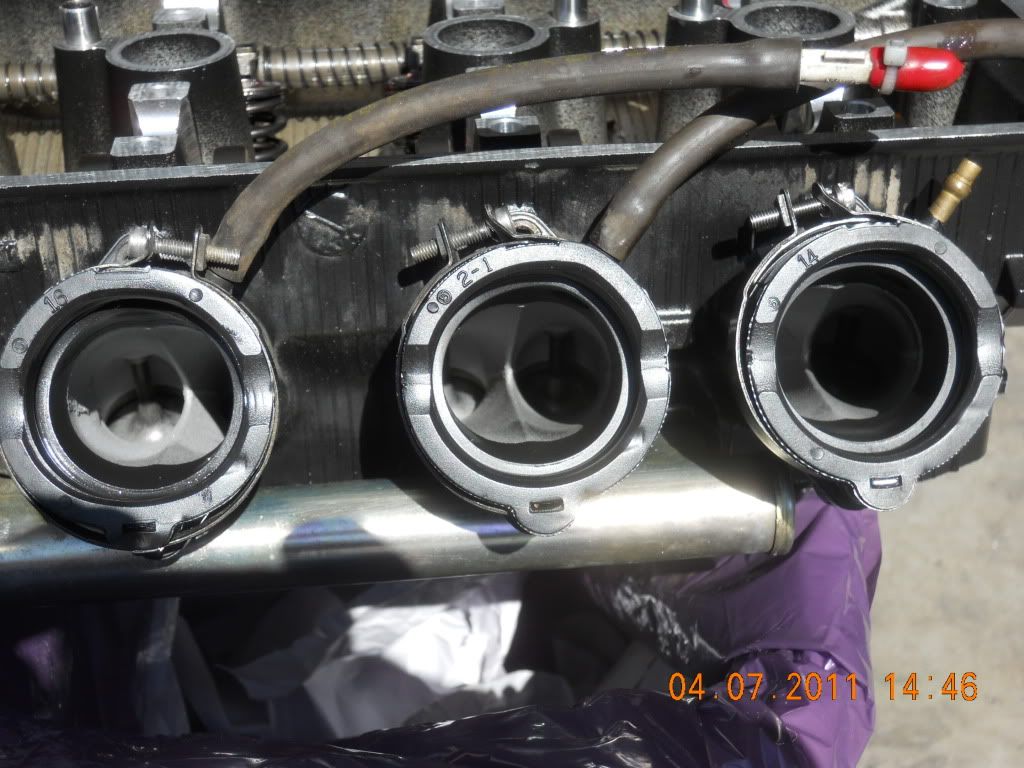
je viens de changer les 4 machins...lol qui tiennent la rampe des carbus.
aujourdhui je recois les 2 autre set de segment. j'espere que d'ici 7 a 10 jours tout sera finis !!!
Posté : mar. 12 avr., 2011 8:24
par Steve Parter
Posté : mar. 12 avr., 2011 13:57
par rc46d
Arf ! Du taf, Bon courage et après que du plaisir.
Posté : mar. 12 avr., 2011 17:08
par Supergus
que c' est beau....
Posté : mer. 13 avr., 2011 16:06
par loic
hier soir :
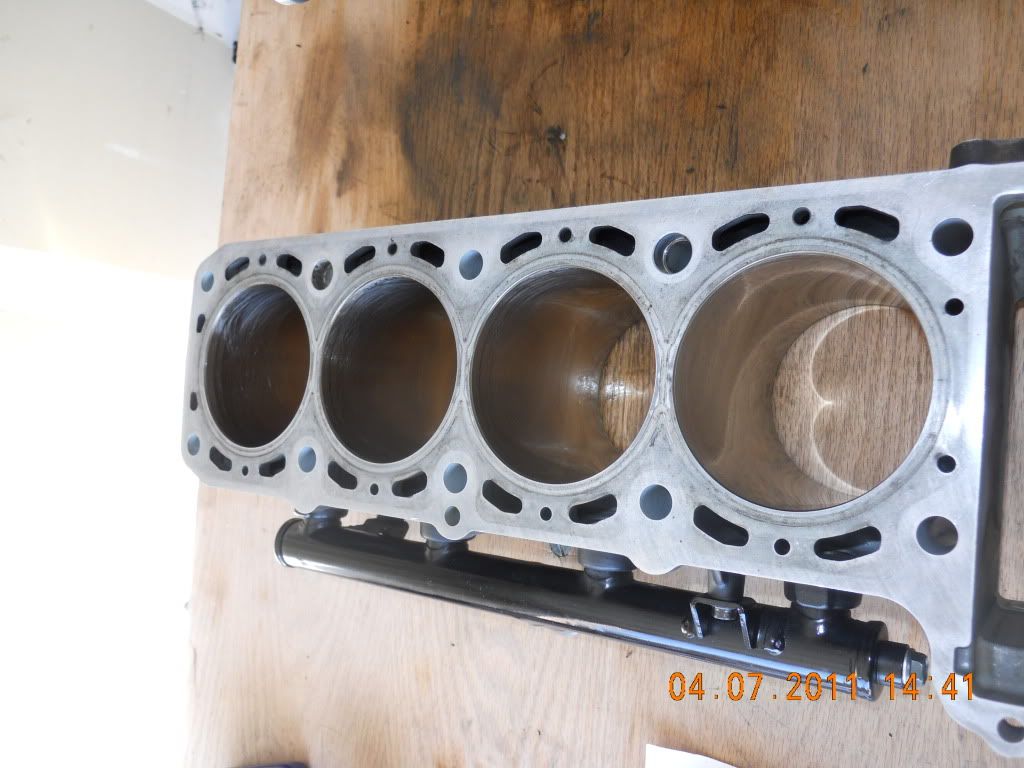
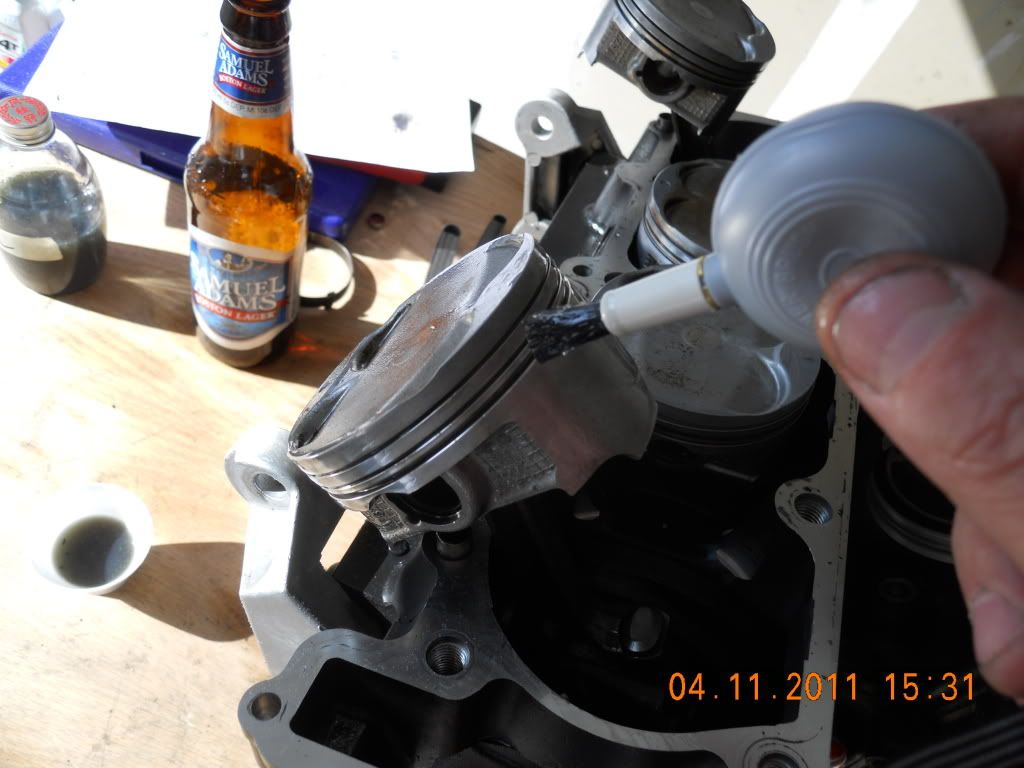
today I started working on the engine arround 4 pm and just stopped... I installed the rest of the pistons rings, put the new cylinder gasket (be carefull it's very very sharp, I cut myself on 4 fingers...) installed the cylinders, installed the new head gasket, the head, the cam shaft, the cam chain, tensioner and all hardware that goes with those things. after installing the cam chain tensioner you need to turn 2 turns counterclock wise, to get the chain tight, well doing that mess up your timing... so tomorrow I need to remove the camshaft again and readjust them.. to install the cylinders was a pain in the butt, but after almost 2 hours I got it, nice and smooth !!
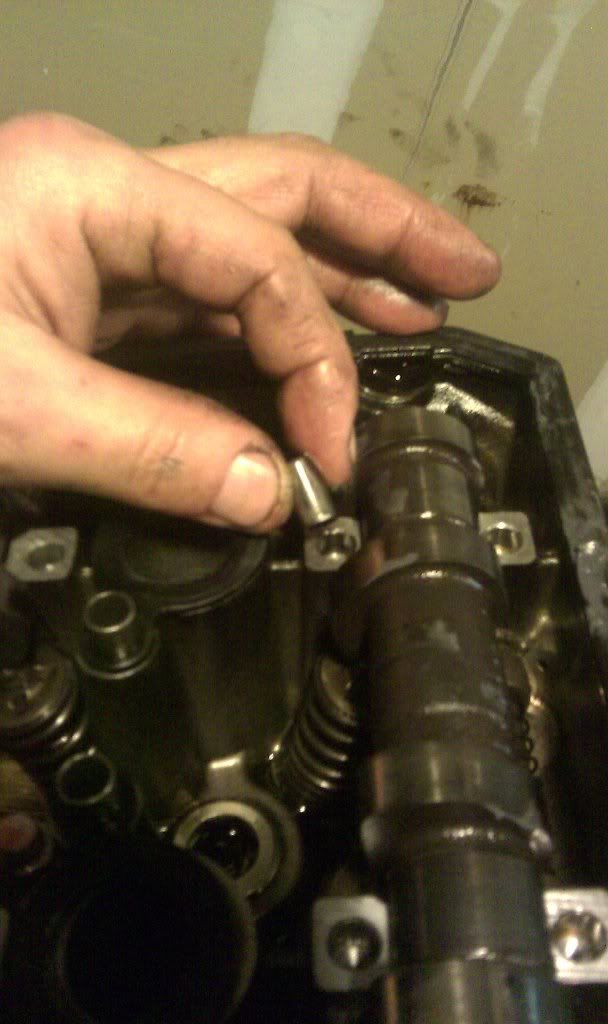
applying moly oil, I used a brush that is supposed to be for cleaning camera lens, it work nice !!
all the rings in place

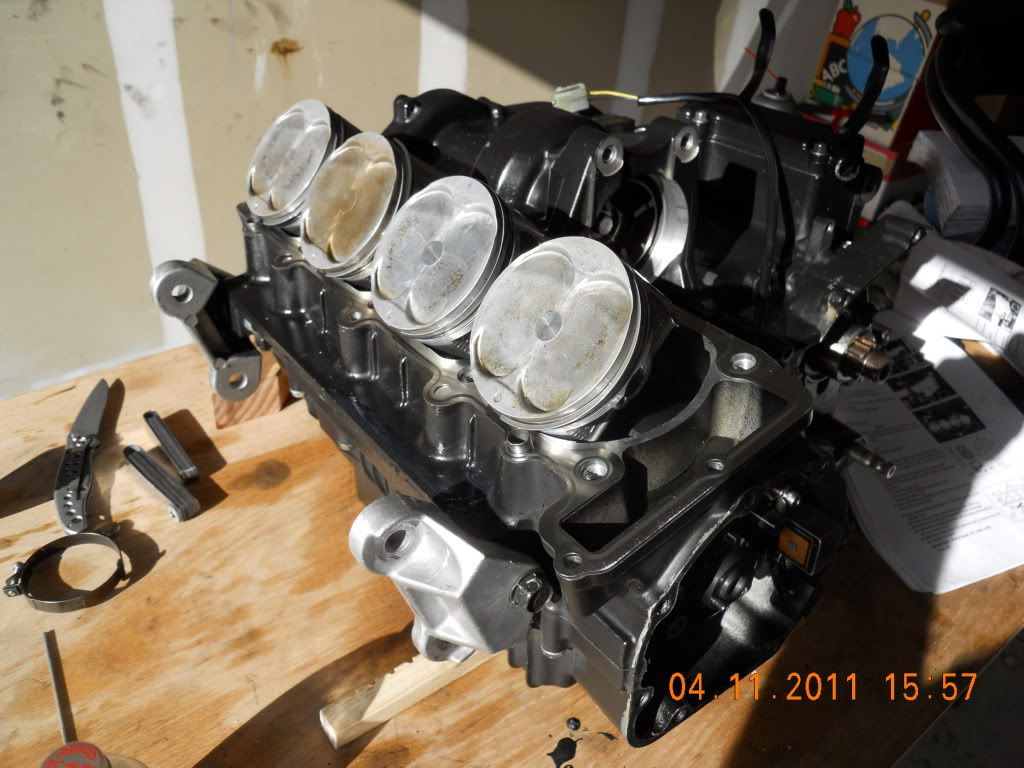
trying to install the cylinders...

....
almost there...

yeah !!! it's in...
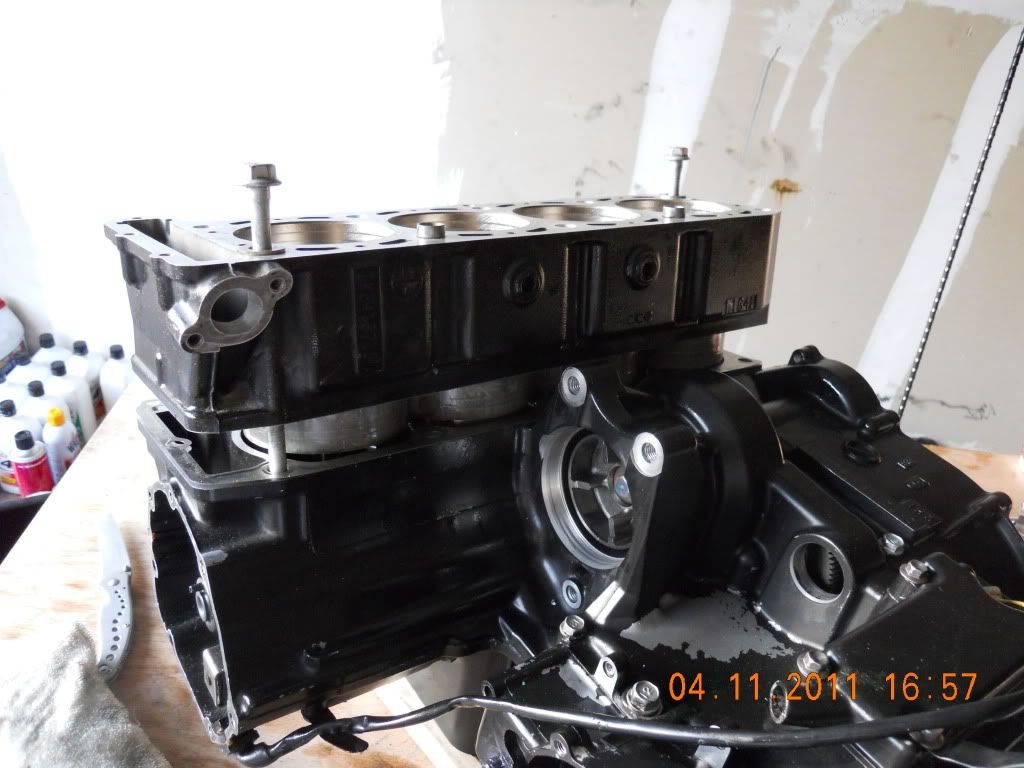
new head gasket

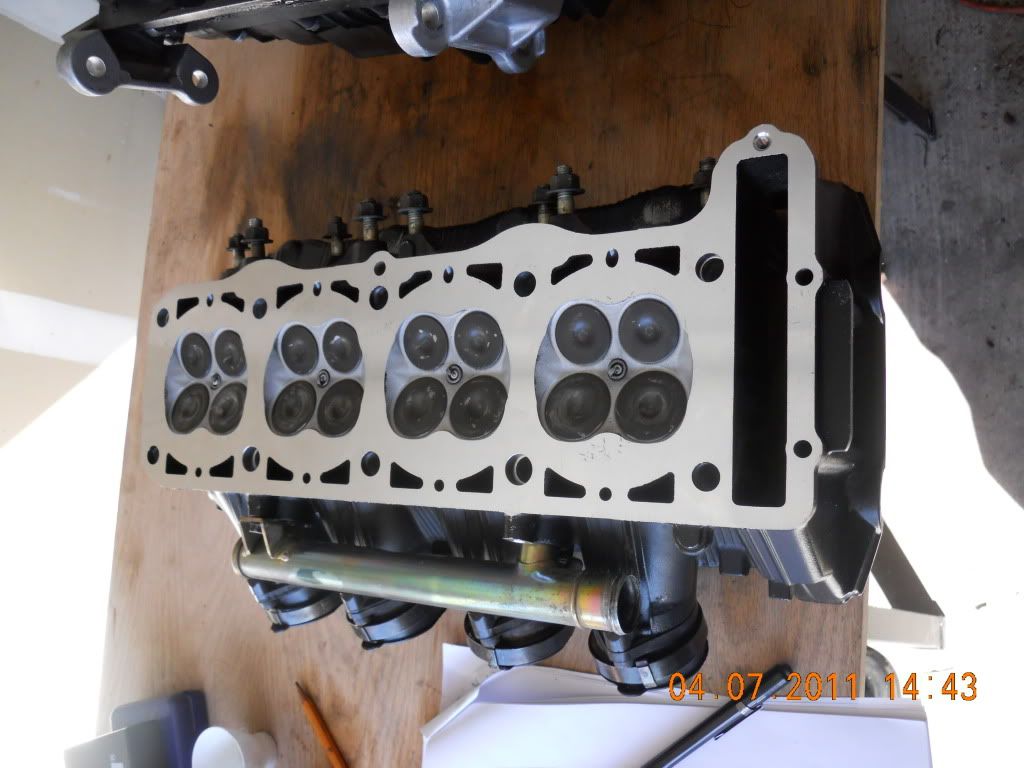
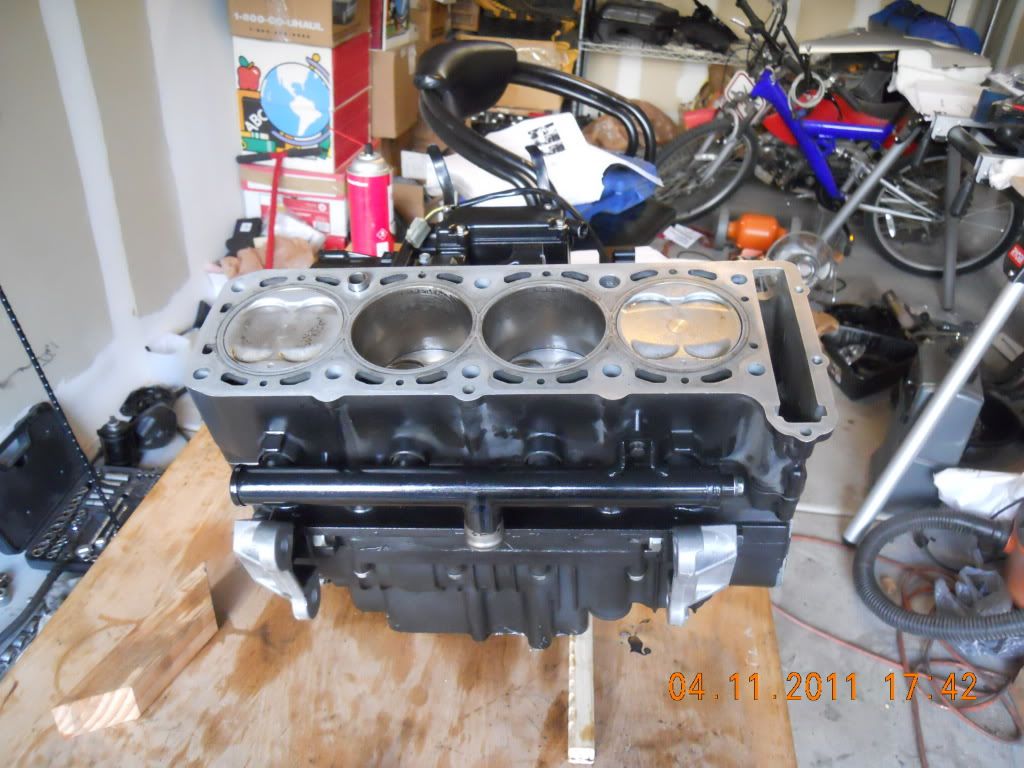
head on
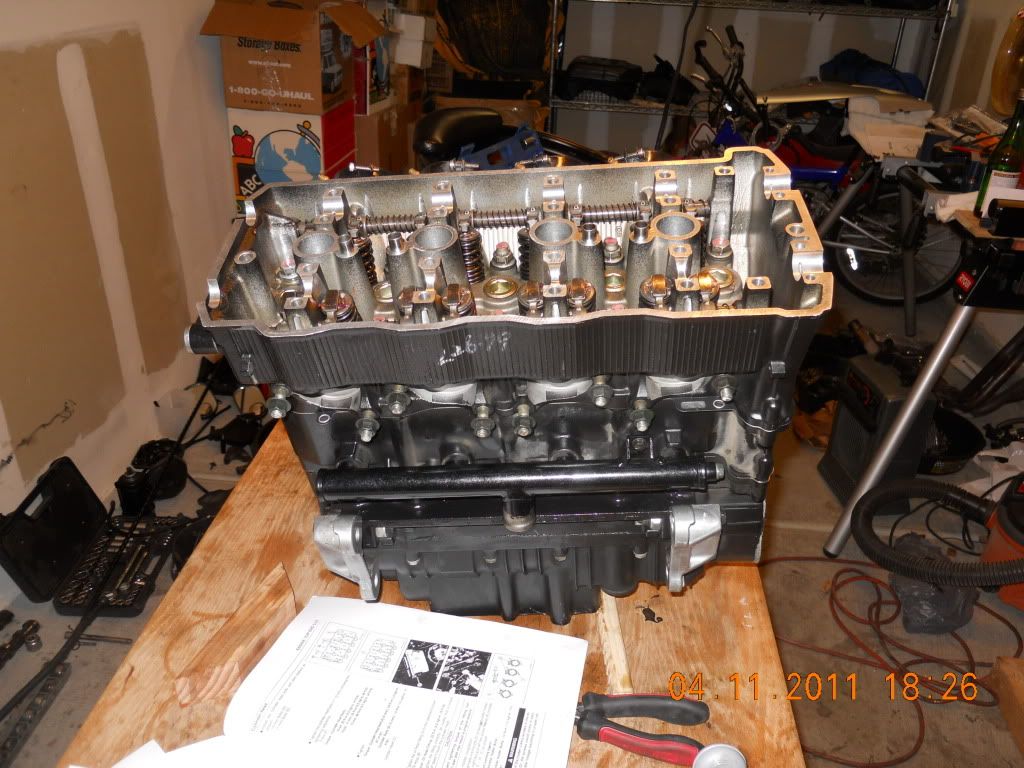
here with the new carbs holder in place

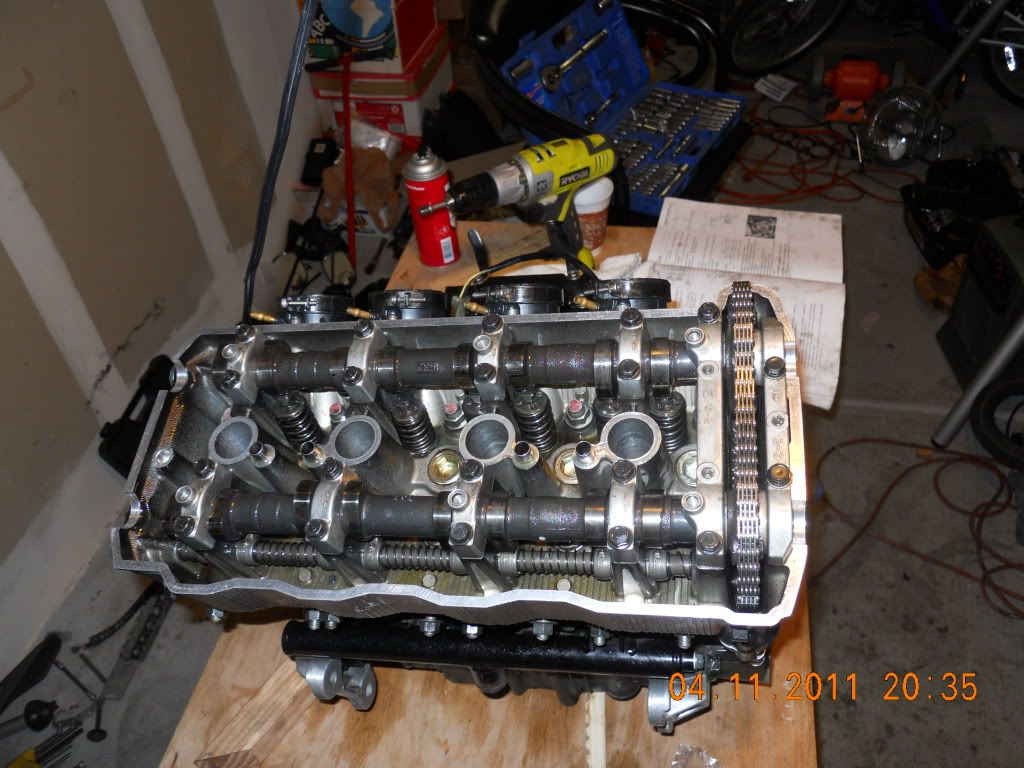
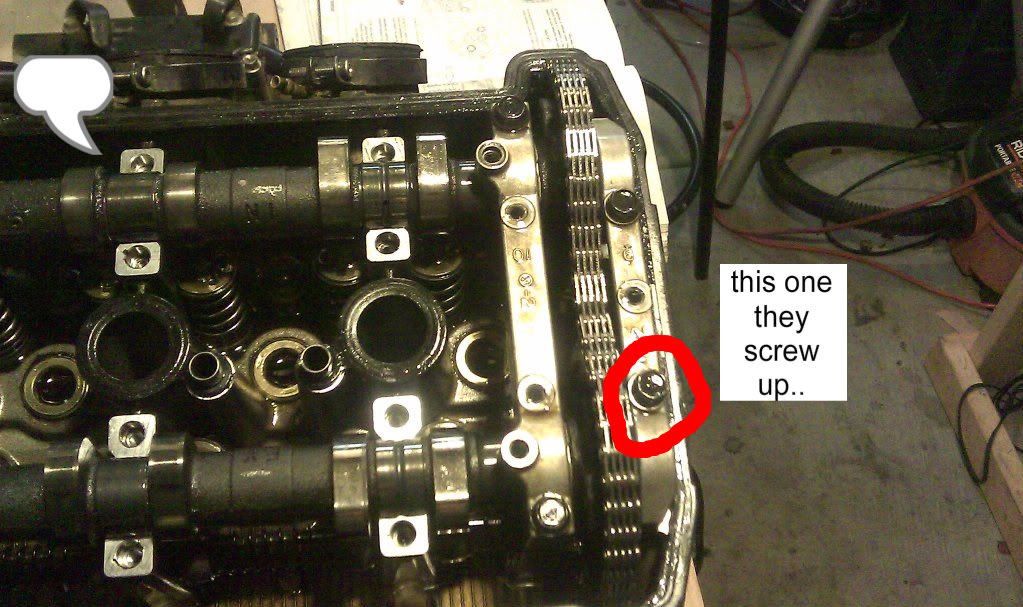
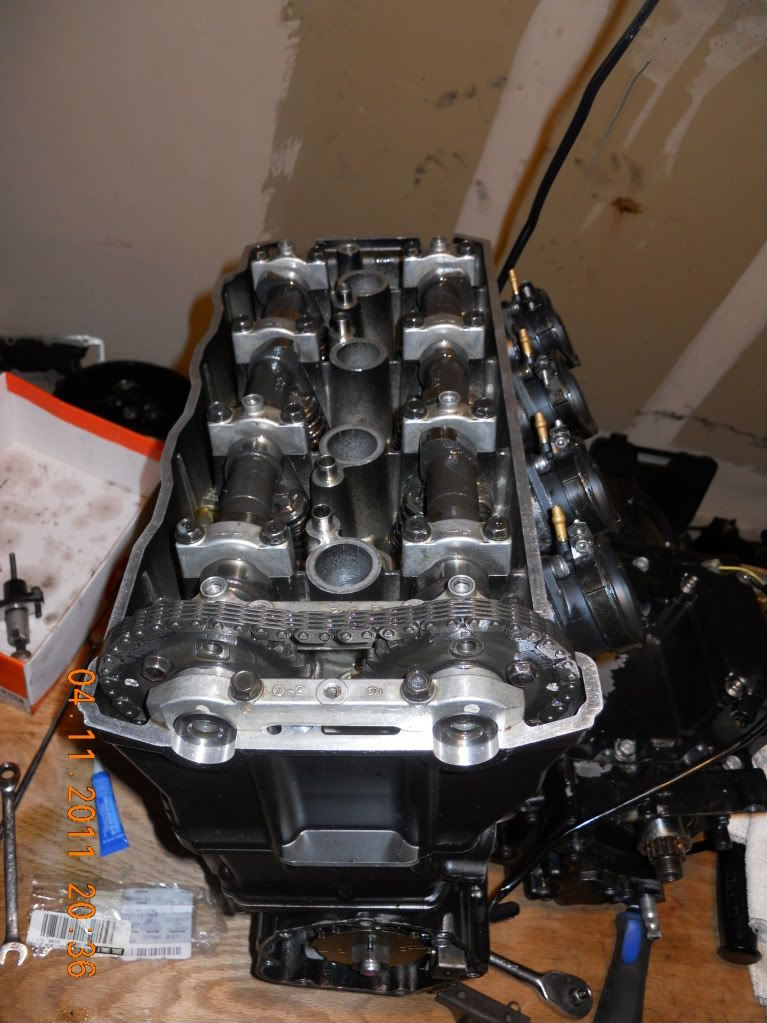
camshafts installed, but now I need to do the timing again...
[/
Posté : mer. 13 avr., 2011 16:09
par rc46d
Et en français contemporain ça donne quoi ?
![[smilie=greencolorz4_pdt_18.gif]](./images/smilies/GreenColorz4_PDT_18.gif "bof !!")
Il me semble qu'ici c'est francophone, mais bon.
Posté : mer. 13 avr., 2011 16:24
par loic
:evil: t'avais quá ecouter en Anglais a l'ecole...
Posté : mer. 13 avr., 2011 16:45
par rc46d
loic a écrit ::evil: t'avais quá ecouter en Anglais a l'ecole...
Ben non, j'aime pas les roses beef. :mrgreen:
Posté : mer. 13 avr., 2011 18:44
par Biboss
Salut Loïc !
C'est impressionnant ce boulot, j'ai perdu le fil, mais les photos c'est beau !
Passe le bonjour à ton épouse
... et à Samuel Adam's, un pote de Boston qui t'a aidé visiblement
![[smilie=greencolorz4_pdt_11.gif]](./images/smilies/GreenColorz4_PDT_11.gif "Colére !")
Posté : mer. 13 avr., 2011 20:20
par denis75
Belle restauration !!!
le montage des pistons avec les segments sans les outils adapté, c'est pas facile !!!
J'espère que le bas moteur a été contrôlé, car avec toute la compression... faudrait pas que ça casse bas le bas moteur ;-)
Posté : mer. 13 avr., 2011 20:27
par Stef29
j 'adore ce genre de CR
jolie le travail de nettoyages des pièces !!
tu vas repartir avec un moteur nickel !!
comme toi j 'aime de temps en temps mettre les mains dans les moteurs de ZZR !!
vos tarifs de pièces sont quand mêmes moins chère que chez nous !!
juste une petite question : je ne vois pas dans ta liste de pièces des goujons de culasse neufs ?
tu pense les changer ?